
Written by Divyanshi Bhamri, QA Engineer at MyGate
1. Introduction
Hello again! This is the fourth part of my series on performance testing with Locust. I hope you all enjoyed my previous posts.
In this article we will talk about sending the GET and POST authentication requests using Locust.
Note: We are going to use hosts similar to reqres [1] restful web services to demonstrate our examples.
Authentication can be done in 2 ways such as:-
- Cookie based
- Token based
We will be covering token based authentications. Token can either be put in request headers or request body.
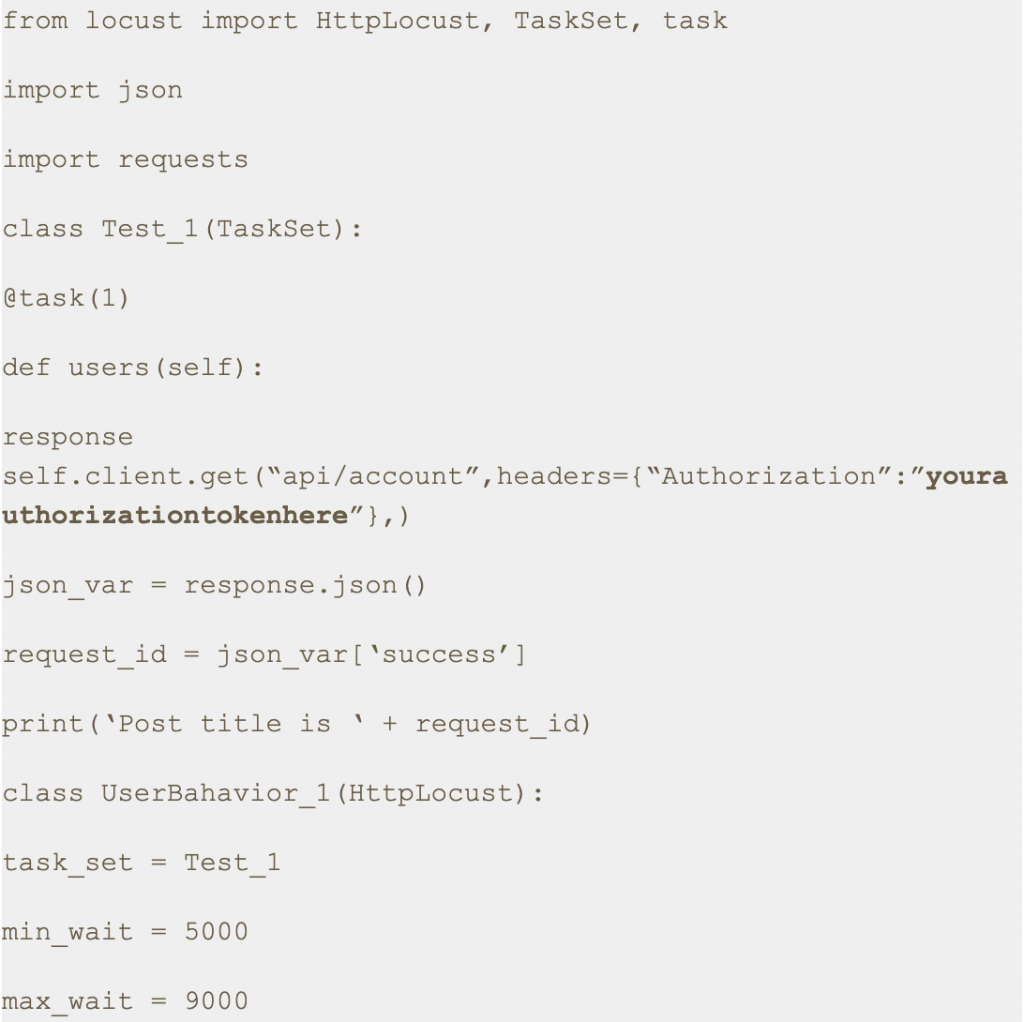
2. Case: GET Request Using Token in Request Headers
Note: For GET authenticate requests, a token can only be put in the request headers, since GET does not have any body.
We will be using https://demo.testfire.net/swagger/index.html, a swagger file which can be used to make an API request to a particular endpoint.
Try to grab the authorization token, using the swagger link mentioned above.
Step 1: Save this script with .py extension. I have saved this script as auth2.py.
Step 2: Run the following command.

Step 3: Open a browser and navigate to http://localhost:8089
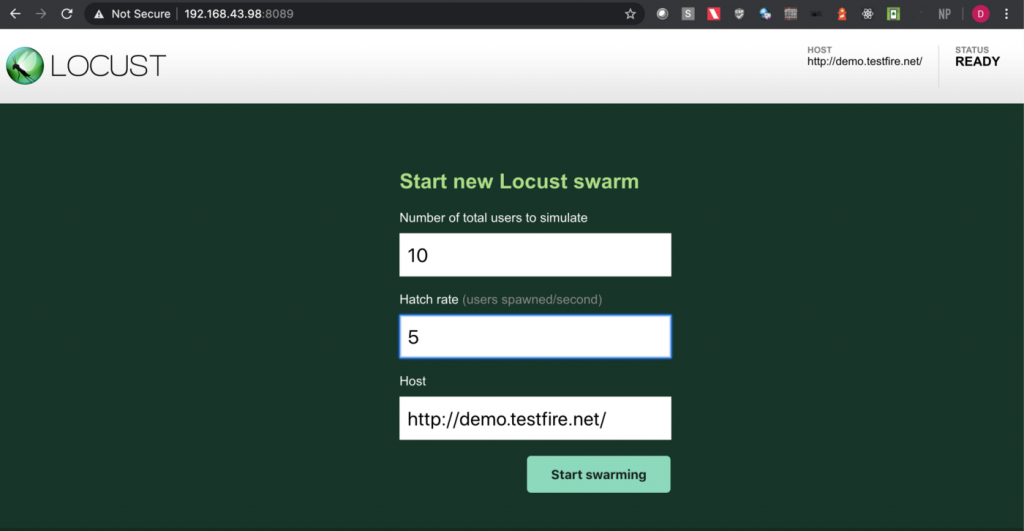
Step 4: Upon opening the page, enter the number of users and hatch rate. Click on the ‘Start swarming’ button.
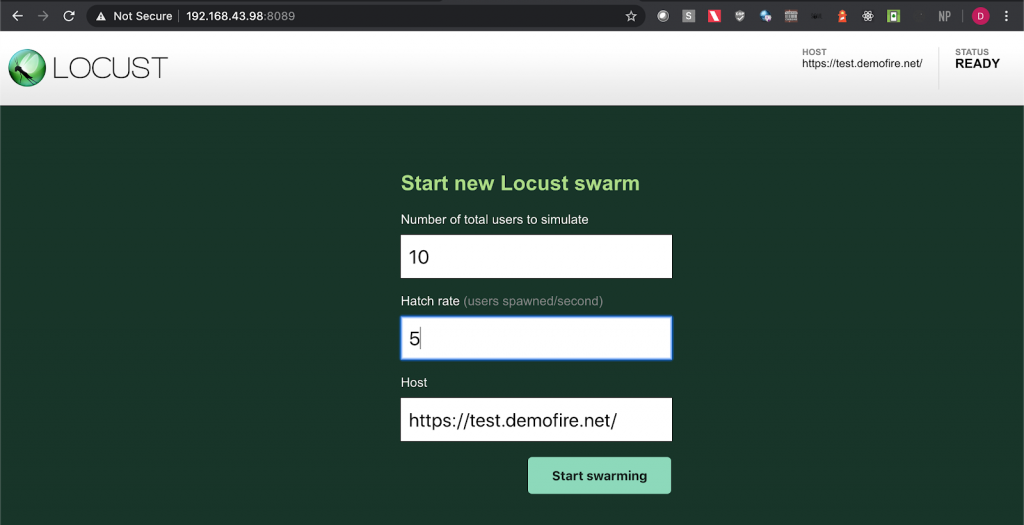
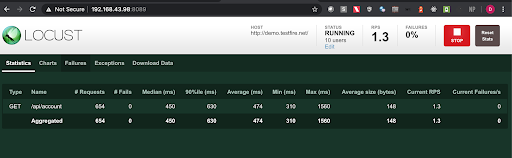
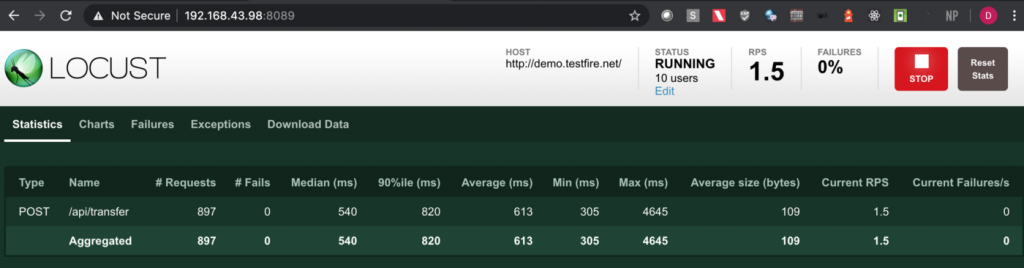
Step 5: Check the locust UI, in which the test starts automatically.
Note: In this approach we first get the authorization token using one of the api endpoints in the swagger file and then we put the same token in the headers section with the key ‘Authorization’ in the python script.
3. Post Request Cases
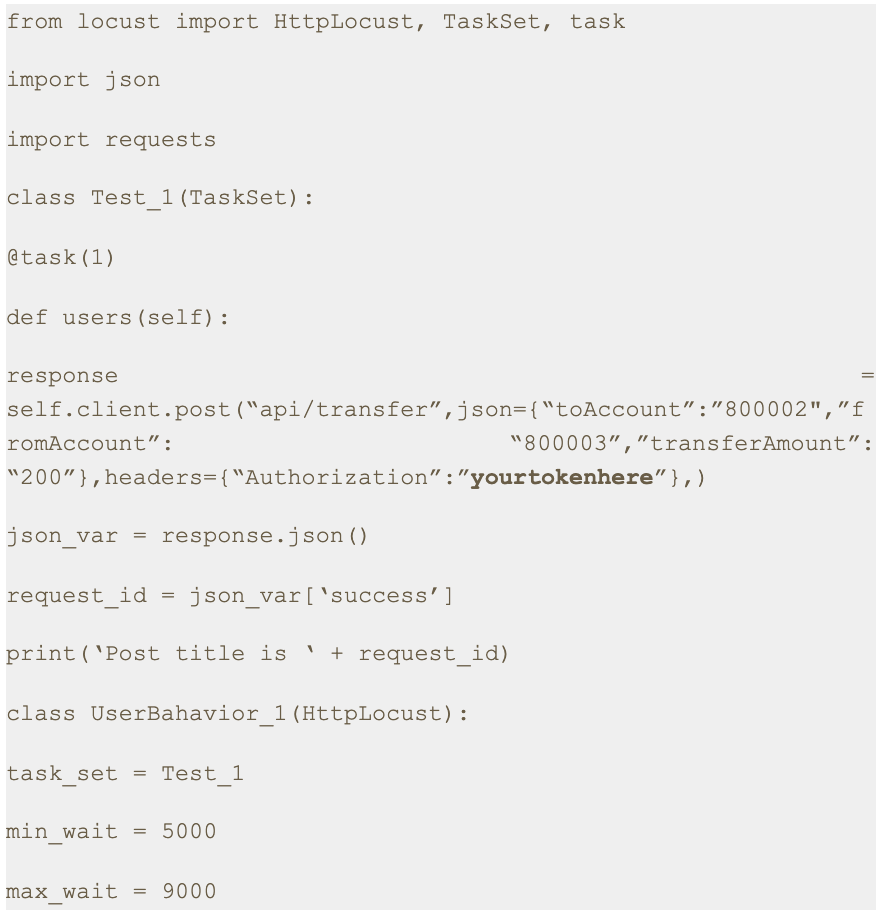
3.1. Case: Sending POST request with token in the Body Parameter
Step 1: Save this script with .py extension. I have saved this script as auth.py.
Step 2: Run the following command.


Step 3: Open a browser and navigate to http://localhost:8089
Step 4: Upon opening the page, enter the number of users and hatch rate. Click on the ‘Start swarming’ button.
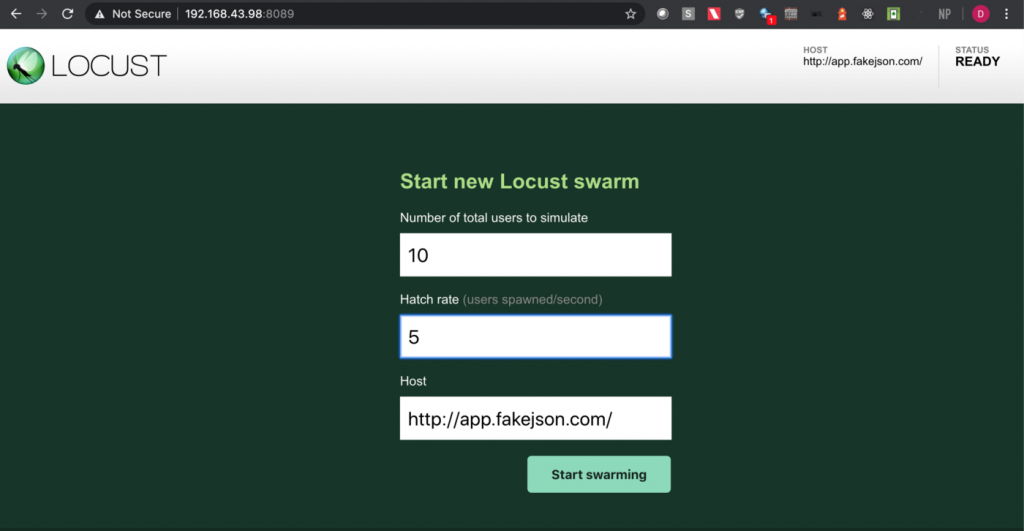
Step 5: Check the locust UI in which the test starts automatically.
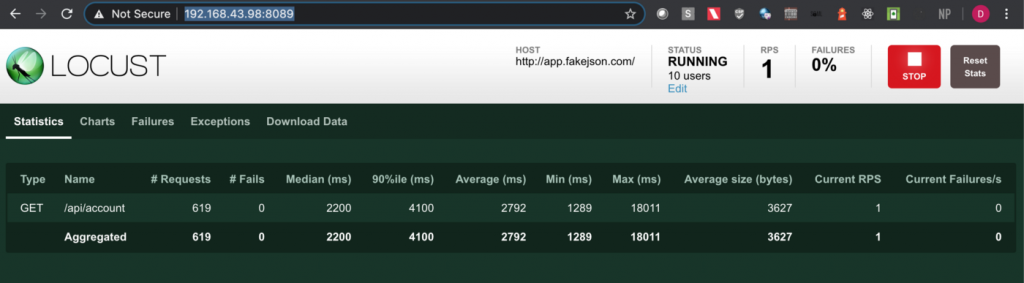
Note: I have used https://app.fakejson.com [3] for testing this endpoint. Just signup, get the token and replace the token field with yours. The token in this script is placed in the body parameter with the key set as ‘token’.
3.2. Case: Sending POST request with token in the Request Header
Step 1: Save this script with .py extension. I have saved this script as auth3.py.
Step 2: Run the following command.

Step 3: Open a browser and navigate to http://localhost:8089
Step 4: Upon opening the page, enter the number of users and hatch rate. Click on the ‘Start swarming’ button.
Step 5: Check the locust UI in which the test starts automatically.
Note: In this approach we first get the authorization token using one of the API endpoints in the swagger file and then we put the same token in the headers with the key set as ‘Authorization’ in the python script.
4. Conclusion
This is the fourth article of the series. In the next part we will learn about some more interesting aspects of Locust [4].
Thanks for reading. I hope this article provides you with a better idea about how to send an authenticated request for both GET and POST methods.
References
[1] Mock API
https://reqres.in/api
[2] Vulnerable Application
https://demo.testfire.net/
[3] Fake Online REST API for Testing and Prototyping
https://app.fakejson.com
[4] Locust Documentation.
https://docs.locust.io/
Disclaimer
This is a curated post of an article published at Medium.