
Written by Divyanshi Bhamri, QA Engineer at MyGate
1. Introduction
Hello again. This is the fifth article of a series on performance testing with Locust. I hope you all enjoyed my previous articles.
In this article we will be talking about distributed load testing using Locust or in simple terms Master-Slave load testing using Locust [1].
Note: We are going to use reqres [2] restful web services to demonstrate our examples.
2. Why distributed testing?
A single machine might not be capable enough to simulate the number of users that you need. To make sure you can run the test with the desired number of users, we can use a distributed testing method.
Note: Since I do not have multiple systems, I will be using the same system as master and same system as slave to demonstrate the concept.
Before starting let us familiarise ourselves with some terms.
Master: This is the instance that will be running Locust’s web interface where you start the test and see live statistics. The master node does not simulate any users itself. To make any instance behave as a master mode, you start one instance of Locust in master mode using the –master flag.
Note: There will be only one master in the setup.
Slave: This instance will be simulating the users. To make any instance run in slave mode, use the –slave flag.
Note: There can be one or more than one slaves in the setup.
Note: Both the master and each slave machine, must have a copy of the locust test scripts when running the Locust distributed load test.
Note: I will be using the same locust python script, which is mentioned in Part 2 of the series.
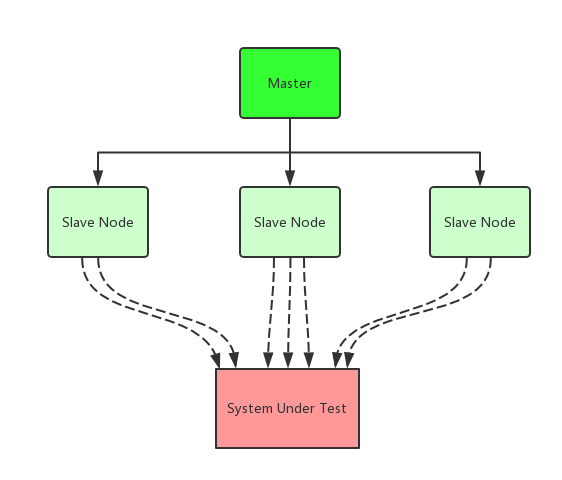
Master and Slave implementation
using simple diagrams
3. Case: Implementation of the Master and Slave mode
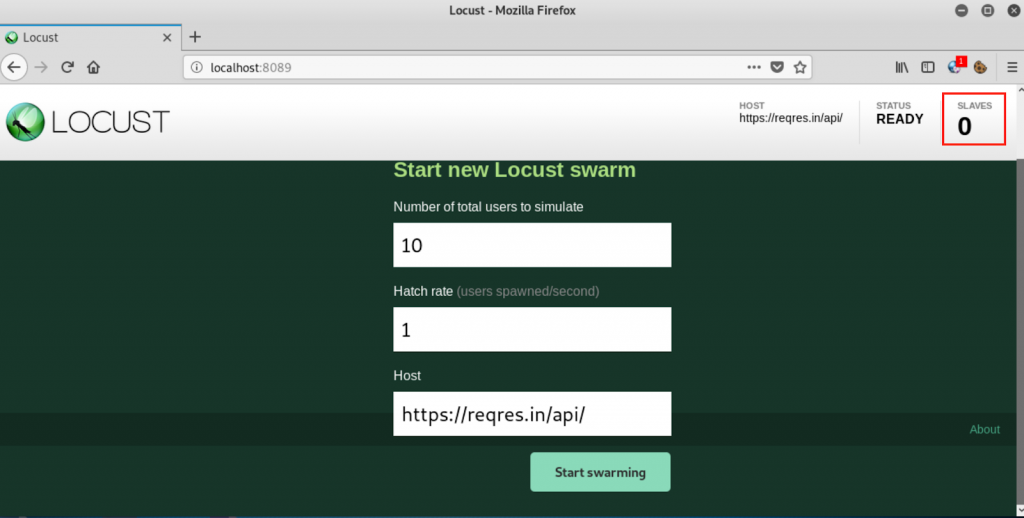
Step 1: Move to the directory where you have copied the script. I have named the same script as master.py
Step 2: Run the following command to run it as a master mode.

Step 3: Open a browser and navigate to http://localhost:8089
You will notice that one more section has been added for slave options. Currently this will be 0 because we have not added slaves to the master.
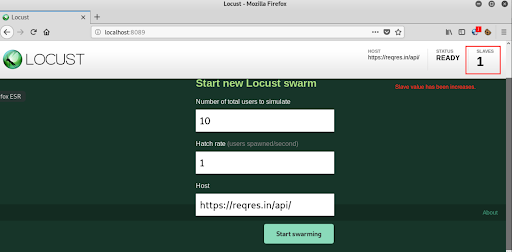
Step 4: Now run the following command to bring up the 1st slave node and attach it to the master node.

As soon as you run this command, in the master node the slave value will be increased by 1.
Note: We can use 127.0.0.1, because master and slave are on the same machine. But if your master is on a different machine, please enter that particular IP.
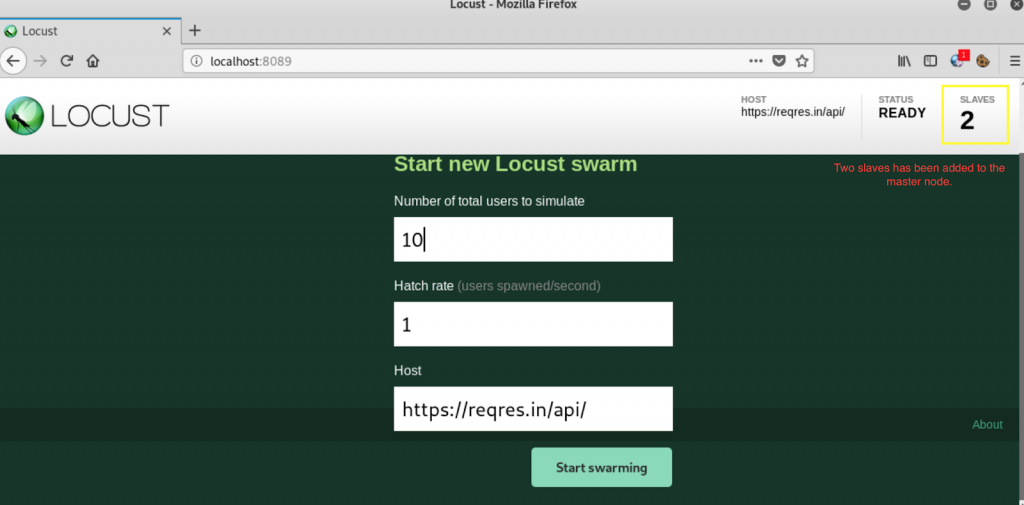
Step 5: Run the same command mentioned in Step 4 as many times as you want to increase the slave count.Note: I will show a demo with 2 slave nodes.
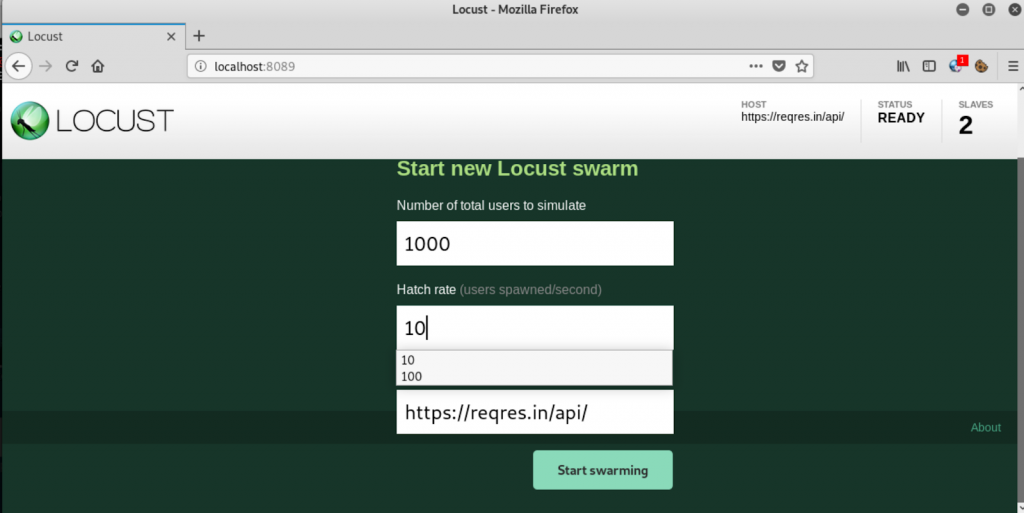
Step 6: Enter the number of users and hatch rate as per your requirement. click on the ‘Start swarming’ button.
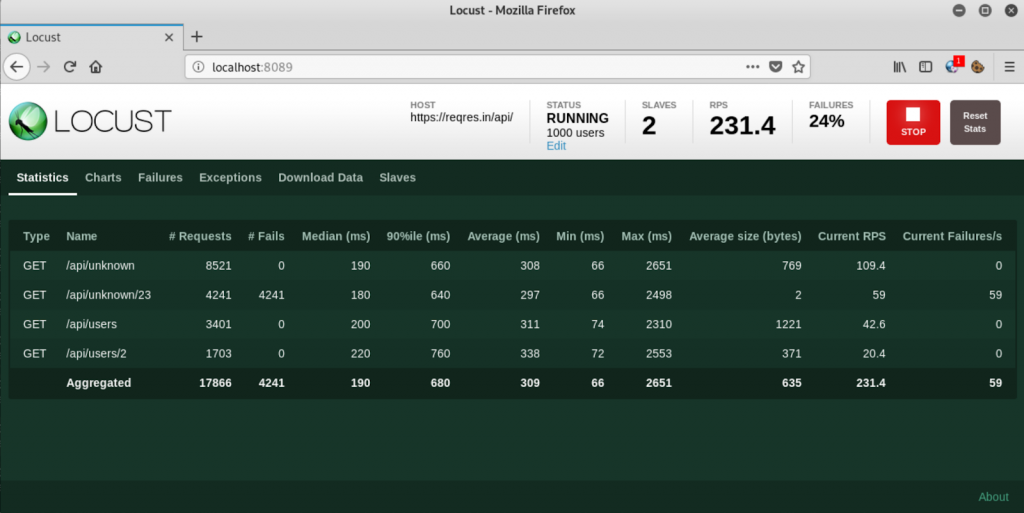
Step 7: The test will start automatically and you will see the result immediately.
Distributed testing is one of the best ways to simulate an environment in which you can mimic your production setup with as many users as you want.
A common set up is to run a single master on one machine, and then run one slave instance per processor core on the slave machines.
4. Conclusion
This is the fifth part of the series. In the next part we will learn about more interesting aspects of Locust.
Thanks for reading. I hope this article provides you the basic idea about distributed testing with Locust.
References
[1] Locust Documentation
https://docs.locust.io/
[2] Mock API
https://reqres.in/api
[3] Distributed Load Testing
https://www.yangyang.cloud/blog/2018/11/a3/distributed-load-testing-by-locust/
Disclaimer
This is a curated post of an article published at Medium.