
Bathroom taps are probably the most commonly used water taps and also the most ignored ones. If they are clean or freshly installed, they tend to uplift the overall appearance of your bathroom. If not, you would feel like you are in a zombie movie set.
A clean water tap, if ignored, also gets dirty with time and develops a stubborn coating as a result of prolonged use. People would know this, especially the young professionals who do not have time to do a deep cleaning, as they are too much sucked into work. After a while, those bathroom taps start looking ugly and hard to ignore. That is when you know it is about time for water taps cleaning.
Why do taps get dirty?
If your bathroom taps look dirty, consider these reasons while you wonder how to clean water taps.
Hard water stains – if the quality of water reaching your household is hard, i.e., high in minerals and salts, these minerals start to accumulate on your bathroom taps. And to add to that, if you use hot water, the steam from the water containing those salts and minerals tends to settle on other areas of the tap.
Limescale deposits – With time, one would notice a hard chalk-like substance deposited over the tap filters around it. That is calcium carbonate and other salts that may often slow down the water flow of your taps due to heavy accumulation.
Dirt and grime – More often than not, we tend to touch the knob of our bathroom taps with oily or dirty hands. This results in the deposit of dirt, especially on the knobs. It is essential to clean it while you are on tap cleaning.
How to clean water taps?
Let’s find out how to clean taps in your bathroom and remove those stains that are bringing down the overall aesthetics of your bathroom.
But before you start learning how to clean steel taps, make sure you have these tools handy for the work. Don’t worry, they are not industrial tools, but ones you will easily find in your house. We recommend:
- An old toothbrush
- A dishwashing sponge with a hard scouring surface
- A microfiber cloth
- A spray bottle
For water tap cleaning, here are the ingredients that you would require. Don’t worry; you won’t need to run to the market again. You would find them right in your kitchen:
- White vinegar or lime
- Baking Soda
- Salt
- Dishwashing liquid
Simple, right?
Now let’s dive into what exactly needs to be done for water taps cleaning:
1. How to clean water taps with white vinegar or lime?
Step 1: Take equal quantities of water and white vinegar in a spray and shake the bottle to mix the components. If you do not have vinegar, you can use lime juice. This method is very effective if you struggle with limescale deposits on your taps.
Next, spray evenly on the surface of your bathroom taps and let it rest for 30 minutes to an hour for the acidity of these ingredients to act upon the tough stains or limescale deposits. Clean it with a microfiber cloth.
2. Water taps cleaning with dishwashing liquid
If the stains do not go entirely with vinegar or lime, what you can do is mix a few drops of dishwashing liquid in a bowl of lukewarm water and soak a dishwashing sponge with a hard scouring surface and scrub the dirty parts of the tap. You may require the old toothbrush we mentioned earlier to get to the corners and hard-to-reach spots. Next, rinse the tap thoroughly with lukewarm water and dry with a towel or tissue paper.
3. Clean water tap with baking soda
Baking soda helps remove the grime deposits on your taps due to its alkaline nature. All you need to do is mix 3-4 tablespoons of baking soda with 250 ml of water and apply the paste-like mixture to the bathroom taps. Make sure you give it a couple of hours at best to sit through and act on the stained surface.
Next, scrub the tap using a scrubber or a sponge with a hard scouring surface and a toothbrush to clean hard-to-reach spots. Clean it with water to see the stains disappear, making way to a sparkling clean water tap.
4. How to clean taps with salt?
Pour salt over the affected areas of the tap and let it sit for a few hours. This allows the salt to break down deposits due to hard water and also helps remove germs. Next, scrub it using a scrubber and rinse the taps thoroughly with lukewarm water to get clean, shiny taps.
To keep your taps in top shape is a task. That is why it is essential to do it frequently, as it saves the energy otherwise wasted in water tap cleaning after a long time.
There are many reasons to keep your bathroom clean. A dirty bathroom is a breeding ground for bacteria and germs. These can cause skin infections and other health problems. Additionally, a messy bathroom can be unsightly and embarrassing.
Cleaning the toilet can be challenging if the space is cluttered with toiletries, cosmetics, and cleaning supplies. By taking the time to clean your bathroom regularly and correctly, you can help protect your health and maintain a neat space. This article will discuss how to clean your bathroom with vinegar, one of the most effective natural cleansing agents.
You might be wondering why to clean a bathroom with vinegar. It is excellent for breaking down soap scum and hard water stains, making your bathroom sparkle in no time. These are just a few benefits of vinegar; up next, we have listed some more:
Benefits of cleaning your bathroom with vinegar
There are many reasons you should consider switching to vinegar from your regular bathroom cleaning chemicals. Here are some common ones:
- You can use vinegar to clean all surfaces in the bathroom, including the toilet, sink, countertops, shower and bathtub. Thus, it is very versatile, and you don’t need different types of cleaning agents for different surfaces.
- Vinegar can kill most bacteria or germs. It alters their chemical compositions and breaks down the proteins and fats that make up their cell structure.
- It is a natural deodorant and will eliminate any bad smells. This is an added advantage of using vinegar to clean. You also won’t need to invest in expensive bathroom air fresheners.
- It is an affordable alternative to other cleaners. You are likely to find it in your kitchen itself. Thus, you don’t have to spend anything over your regular utility budget.
- Vinegar is non-toxic. It is made from grapes or apples, so it is a natural product safe for use around the home. This is especially important for people with children or the elderly at home. With harmful chemical cleaners, they are more at risk of an accident. That is not the case with vinegar.
- It is environmentally friendly and biodegradable. Vinegar degrades easily, unlike chemicals that do not dissolve and accumulate in your drains. Thus, you will be contributing to the environment by switching to vinegar.
- Taps are steel, which isn’t a metal you can clean very easily. If you use harsh chemicals, it will blacken the steel surface permanently. But vinegar is a strong natural cleaning agent that does the job very well without harming the surface. It can easily remove white water residual on tap, leaving them as good as new. It can also kill bacteria and germs that may be lurking on the taps.
How to make cleaning solutions with vinegar
Vinegar needs to be mixed with different substances to form a cleaning solution for different surfaces. A 50:50 mixture of vinegar and waterworks for most surfaces. But places like tubs, tiles, and toilets require you to mix it with baking soda or another strong alkali. Mixing vinegar with salt can help clean glass stains. You can also add acids like a spirit or lemon juice to clean hard surfaces like shower panels. If you want to remove bad odour, you can add a few drops of essential oils or fragrances to the mix.
Cleaning bathroom with vinegar: a guide
A bathroom has several places which need regular cleaning. Things like taps, showers, tiles, and drains are used frequently. That’s why they easily accumulate dust, grime, and bacteria. Let’s learn how to clean the bathroom with vinegar in different ways.
1. How to clean bathroom taps with vinegar
Vinegar works well with steel taps and knobs because of its soft cleaning nature. Here’s how you can use it to clean taps in your bathroom:
- Pour some vinegar into a bowl. Do not dilute it with water.
- Soak a cloth in the vinegar and then wring it out to not be too wet. A microfiber cloth is preferred for this job.
- Now gently wipe the taps with the vinegar-soaked cloth. Apply pressure where you see more build-up of grime or stains.
- Now buff the taps with a dry cloth to give them a shine.
2. How to clean bathroom floor with vinegar
- Bathroom floor is used frequently and carries all kinds of germs and stains. Learn how to keep your bathroom floor shining with vinegar:
- Pour vinegar into a bucket.
- Dip a mop into the vinegar and wring it.
- Mop the floor, making sure you reach all the dirt and grime.
- Rinse the floor with water and dry it off with a towel or clean cloth.
3. How to clean bathroom tiles with vinegar
Tiles can be one of the hardest surfaces in the bathroom to clean. The dirt accumulated in the joints of tiles can’t be scrubbed off easily with regular cleaners. Here’s how to clean your tiles properly with vinegar:
- Pour enough vinegar onto the tile floor to get it drenched.
- Use a brush or mop to scrub the tile and grout lines. This will create tension between the floor and the grime. And it will detach itself from the tile.
- Let the vinegar sit on the tile for a few minutes to break down the rest of the grime.
- Rinse the tile with water and dry it off with a clean cloth or towel.
- Repeat as you find it necessary.
4. How to clean showerhead with vinegar
Your showerhead might be dotted with water stains and mould if left unattended. Vinegar can help remove these stains and keep the showerhead clean. Here’s how:
- Carefully remove the shower from the hose.
- Now take a plastic bag and pour vinegar to fill half of it.
- Take the showerhead, gently place it in the bag, and tie it up. Let it sit overnight.
- The next morning, re-attach the showerhead to the hose and run the shower for 5-10 minutes. The shower will get cleaned, and any bad odour will also vanish.
5. How to clean bathroom mirror with vinegar
Water streaks and stains on mirrors are very persistent and equally annoying. Here’s how to clean your bathroom mirror with vinegar:
- Take an empty spray bottle and mix vinegar and water in it in a 50:50 ratio.
- Spray the solution on the mirror and gently wipe it clean.
- Now use a cloth soaked in water to remove the vinegar solution
- Now wipe clean with a dry cotton cloth.
This process may take a little longer than using a commercial cleaner, but it’s worth it to know that you’re not exposing yourself and your family to any harmful chemicals. Vinegar is a natural and safe alternative that easily gets the job done. Be sure to rinse the tile well afterwards to remove any vinegar residue. For best results, use a vinegar solution that is diluted with water. Enjoy a clean and sparkling bathroom.
How to get rid of bathroom odours using vinegar
Bathroom odours are another nuisance that you might have to tackle. So here’s a step-by-step guide on how to remove bathroom odours with vinegar:
- To get rid of bathroom odours with vinegar, start pouring vinegar into a bowl.
- Place the bowl in the bathroom. The vinegar will absorb the odours. Alternatively, you can pour vinegar into a spray bottle and spritz it in the toilet after each use.
- Let the bowl sit in the bathroom overnight. Vinegar is a natural deodorizer that will leave your bathroom smelling fresh and clean. Give it a try!
- Remember to always wipe down surfaces after using the bathroom. This will help prevent dirt and grime from building up over time. After each use, wipe down the toilet, sink, and countertop, and sweep or mop the floor as needed.
Removing the odour is important while learning how to clean the bathroom with vinegar.
Cons of cleaning bathroom with vinegar
Although vinegar is an excellent cleaning agent, there are some cons you must consider before you switch to vinegar. This is good to know as you learn how to clean the bathroom with vinegar. One potential disadvantage of using vinegar is that it can be challenging to remove all vinegar residues once the cleaning is complete. Additionally, vinegar can be acidic and cause damage to the tiles over time if used frequently. Lastly, vinegar can be smelly, so it may not be a desirable option for those who don’t like the smell of vinegar. It may give you a feeling of nausea. However, you can counter this con by mixing vinegar with natural ingredients like lemon.
Things to consider while learning how to clean the bathroom with vinegar
As with any chemical cleaner, we should take precautions when using vinegar in the bathroom. The cautions which we need to take while cleaning the bathroom with vinegar are:
- We should avoid using vinegar on marble surfaces, as it can etch the surface.
- Vinegar can also discolour some surfaces, so we should test it in a small, inconspicuous area before using it on main surfaces.
- We should never mix vinegar with bleach, which can create a dangerous gas.
- Vinegar is a strong acid and can cause skin irritation if it comes into contact with skin, so we should wear gloves when using it. We should also avoid getting it in our eyes.
- If we use vinegar to clean drains, we should make sure that the vinegar is diluted with water, as undiluted vinegar can be harmful to plants. We should also avoid using vinegar to clean toilets, as it can cause the bathroom to become discoloured.
- We should rinse the surfaces we have cleaned with vinegar well, as the vinegar can leave a residue behind.
It is essential to be aware of these cautions, as vinegar is a powerful cleaner and can cause damage if it is not used correctly. However, vinegar can be an effective and affordable way to clean surfaces in the bathroom when used correctly.
Final takeaway
The bathroom is one of the most-used rooms in the house. It’s also a place where grime and dirt can build up over time, making it difficult to keep clean. This is where vinegar comes in handy.
Vinegar is a natural disinfectant that can help kill bacteria and germs, making it an ideal cleaning agent for the bathroom. Not only is vinegar effective at removing dirt and grime, but it’s also affordable and environmentally friendly. So if you’re looking for a safe and effective way to clean your bathroom, consider using vinegar.
Even if you’ve learned how to clean the bathroom with vinegar, don’t be afraid to ask for help if needed. There’s no shame in admitting that you can’t do it all by yourself. Friends or family members may be happy to lend a hand from time to time, and with the help of vinegar, it will get so easy for any of you.
Cleaning your entire house and cleaning the bathroom is almost an apple-to-apple comparison, assuming you have at least two bedrooms, a hall, a kitchen, and two bathrooms to clean. If not, cleaning the bathroom is more time-taking and requires more effort and precision than the entire house. The fact is: the bathroom is an integral part of the daily cleaning routine, and you just can’t get away with it.
Various components in a bathroom are to be taken care of. For instance, even if you clean the entire bathroom and leave the glass partition, tiles, and mirror, you will not feel you have cleaned the bathroom. It is important to clean glass, tiles, and glass partitions properly to get a clean bathroom.
It is also essential to understand why bathroom cleaning takes more effort. As soap scum and talc accumulate over the glass and tiles, cleaning them with just a spray and wipe becomes slightly tricky. Hard water stains only add to the problem, and if unattended for a while, these stains can cause permanent damage to your bathroom glass, tiles, and partitions.
If your bathroom looks cloudy and glass has marks and stains all over it, you need more than just a few chemical cleaners to reverse the damage. A few natural fixes can help you deal with the issue before the damage occurs. You can follow these methods consistently to ensure that you do not have to step into a dirty bathroom ever again.
How to clean glass partition in bathroom
Cleaning the glass partition is among the most demanding things you have to do to clean the bathroom. You need to ensure that the glass partitions are cleaned regularly to avoid permanent damage.
So, you can clean your bathroom shower glass in 4 simple steps. Here are the steps that you need to follow to clean glass partitions in your bathroom:
Wipe it down
One of the basic things that you can do every day is to use a squeegee or a microfiber cloth to wipe down the glass partitions once a day or, if possible, after every shower. This would help in keeping the glass partitions clean.
Spray it up
After you have wiped the glass partitions, you can use a glass cleaner spray to clean any soap scum that still may have been there. Alternatively, you can use the following formulation to create a glass cleaner spray for yourself:
- Half cup hydrogen peroxide
- Half cup rubbing alcohol
- 1 teaspoon liquid dish soap
- 1 tablespoon dishwasher rinse aid
This formulation would help you create a glass cleaner spray for yourself. You can store it in a spray bottle and swirl it before every use – swirl, not shake. You should keep it away from sunlight and children’s reach.
You can also use lemon furniture oil to avoid the buildup of soap and hard water on glass partitions. After wiping the glass clean, you can apply the lemon furniture oil on the glass and let it rest for a few minutes before wiping off the excess. It would create a thin film of protection over the glass.
Deep-cleaning
If the first two steps don’t give the expected results, it means that you have not been cleaning your glass partitions regularly, and your bathroom needs a deep cleaning. This essentially means that you will have to put some effort into having that sparkling bathroom back again.
- You can start with scrubbing with a sponge or dryer sheets.
- For the soap scum residue, you should use a non-toxic degreasing cleaner or use vinegar that is heated to almost boiling.
- You can apply this solution in grimy areas and let it rest for 10 minutes before wiping it off with a wet non-abrasive rag or sponge.
Other solutions
If you still feel there is some work to be done, you can use natural ingredients like vinegar, salt, and baking soda. This is the tried and tested mixture for bathroom cleaning if you hate the smell of chemical cleaners. You can spray vinegar on the glass partitions and let it rest for a few minutes. Next, you can mix baking soda and salt in equal measure and create a paste. You can use a sponge to apply this paste all over the glass and rinse well for a good effect. These natural solutions will come in handy to quickly tackle the stains and hard watermarks.
How to clean glass mirror in bathroom
Glass mirrors and glass partitions can be cleaned in similar ways. You can also use the natural ingredient formula of salt, vinegar, and baking soda to clean the glass. Alternatively, suppose you are short on time. In that case, you can also use the automotive products used to clean the windshield to clean the glass partitions and glass mirrors. You can use these products every three to four weeks and keep the bathroom glass clean with ease.
You can also use a dry cloth to do the regular cleaning of the glass mirror in the bathroom. You can use the water spray bottle to avoid any friction and clean the glass mirror with ease.
How to clean glass tiles in bathroom shower
After the glass and glass partitions, one of the most critical components is the tiles. You need to take proper care of the tiles to ensure that they stay in good shape for a long time. As a result, you need to remove any backsplash, soap scum, or talc that may accumulate regularly on the tile’s surface. One of the easiest ways to do it is by cleaning it regularly. You can use a mixture of vinegar and water in equal parts in a spray bottle. You can spray the mixture on the tiles after a shower and leave it to rest for around 10 minutes. Various solutions can be used for multiple problems. Some tested ways are as follows:
Soap scum: To remove the soap scum, you can look at other solutions like white vinegar and baking soda mixture.Stains: You can also use vinegar over the stains and sodium bicarbonate until the bubbles start forming. Once you see some bubbles, rinse the solution with cold water and wipe it dry. Toothpaste can also be used to clean stains on your shower tiles in the bathroom.Backsplashes: The marks of backsplashes do not look nice, but you do not need to break your head in finding an optimal solution. Add half a teaspoon of dish detergent to a spray bottle filled with warm water. You can spray this solution directly on the tiles and wipe them dry or use a sponge to clean the tiles.These are some ways to help you keep your bathroom clean. One of the ways that can help you make this task easy is by abandoning the soap bars that contain talc. As talc is one of the primary components that cause soap buildup in the first place, you should use a soap bar without talc or switch to a liquid shower gel or cream. In this manner, you’ll be able to reduce the soap residue and hard water stains on the glass surfaces.
It is still not very tough if you cannot use a soap bar without talc. The glass, tiles, and glass partitions are some areas that require regular cleaning in a bathroom. Rather than finding yourself deep-cleaning every few months, it is better that you create a schedule of cleaning the bathroom regularly. The methods explained above can help you keep your bathroom clean. You can select the right one as per your preferences and start cleaning today.
The Best Ways to Clean Your Bathroom Tiles and Floor
How to Clean Bathroom Taps: Home Remedies
How to Clean a Bathroom with Acid
About MyGate
MyGate is India’s largest housing society management software, benefiting thousands of housing societies, developers, society facility managers, and millions of homeowners in every Indian city.
Home ServicesWe assume that our electrical equipment will function as intended when we need them. We can even be inclined to brush off a little issue hoping it would disappear. Unfortunately, that minor issue has the potential to balloon and completely upend your life. When everyday devices like mobile phones and washing machines suffer damage, the situation worsens. For washing clothes daily, a washing machine is an essential technological appliance. We’ll demonstrate how to fix it yourself at home, so you don’t have to look up “how to repair washing machines” online. Repairing a washing machine may seem difficult, but the internal workings are straightforward. In this article, we will learn about various problems with washing machines and the best methods to repair washing machines at home.
How to repair washing machine?
1. Deep clean
One of the greatest ways to fix a washing machine is too deep clean it. It can either be done by professionals like Mygate home services or at home using a machine cleaner that is purchased. Magnesium, iron, and chlorine can collect delicate components like sensors in the machine’s tub if used continuously without being thoroughly cleaned. These residues could seriously harm your machine if they aren’t regularly cleared. Therefore, spend only 500 on a machine cleaner and give the machine a thorough cleaning.
2. Clean trays
The machine can mix soap with water and then pour the mixture into the tub thanks to dispenser trays for detergent. This procedure is fairly orderly. However, if the trays are not thoroughly cleaned, there is a slow accumulation of detergent residue over time.
3. Use the right detergent
Although it seems strange to say, this is a crucial hack. You must not use an overly abrasive detergent. High alkali compounds shouldn’t be present because they may harm your machine’s and your garments’ components. Use a detergent that complies with accepted environmental requirements to prevent such occurrences.
How to fix washing machine at home guide
1. Washing machine not starting
The washing machine won’t start. It is the most elementary washing machine malfunction. Nothing happens when you place the laundry in the washer, click the “start” button, or turn the dial. Following are the various washing machine repair tricks if it is not starting:
- Make sure the washer’s power cord is plugged in by checking behind the washer. Machines may shift due to the washers’ violent movements, particularly when the load is unbalanced. It’s possible for a machine to accidently unhook the power cord while it moves. You may also untie the cord from the hook to save yourself from such problems afterwards.
- Is the washer’s circuit breaker turned off? Locate the electrical service panel and reset the circuit breakers there. Find the appropriate circuit breaker and turn it off before turning it back on.
- The lid switch strike on your front-loading washer can be broken. This part of the door frame tells the machine that the door is closed all the way and that it is safe to start filling with water. The top piece should fit snugly into the bottom piece. If you have a top loader, test the lid by turning the machine to “On” and inserting the blunt end of a pen into the hole. Even with the lid open, the water should start filling if everything is functioning properly.
2. Washing machine not cleaning clothes
The most typical issue with washing machines is this one. Although cleaning clothes is the washing machine’s primary function, what if it isn’t doing it correctly? Use the “how to fix washing machine” guide in this situation to address the cleaning issue.
- Do not overfill your washer. The clean rinse water needed to remove the detergent and dirt cannot fit inside a washer that is too full. Many garments remain filthy as a result of this.
- Lessen the detergent use. Using too much detergent may not remove the lint and other particles from the clothing but rather deposit it back on it.
- Wash blankets and dog beds for pets separately from your other clothing. As pet supplies can further make the clothes dirty.
3. Washing machine not spinning properly
You can easily repair washing machines, even if they are not spinning properly. The process of squeezing the water out of the clothing so that it can be dried in the dryer involves spinning at a high rate of speed. Your washing machine must be repaired immediately if it is not spinning. To resolve this issue, see the “how to repair washing machines at home” guide:
- Try to reorganise the clothing within the washer tub. When the washing machine washer is not balanced properly, it will shut off until you can balance the laundry again. Close the lid once more after rearranging the clothing. If the load distribution is proper, the machine should begin spinning independently. High-absorption items like towels, sheets, and bulky apparel like trousers and sweaters frequently cause loads to become unbalanced.
- Verify the machine’s floor level. Your clothes washer is programmed to stop spinning when a machine is out of level for safety. Use a bubble level to check the machine’s level, and then adjust the legs to level it again.
- Verify the drain line and drainage system. The machine’s drainage system could become clogged with small objects. Without taking the washer apart, you might be able to inspect the drain pump. The drainage hose connecting the machine to the drainage point may also be blocked.
4. Washing machine making loud noises
When the washer creates noises during the spin cycles, this is a more bothersome washing machine issue. Since this type of movement could harm the washer and lead to other issues. Repair the washing machine at home and fix this problem as soon as possible.
- The tub bearings, found directly underneath the tub, could need to be replaced since they are worn out. The tub bearings may require oil if the washing machine is making noises.
- The drive belt or pulley for the washing machine motor could be worn out. To access the motor in this repair, a sizable portion of the machine must be disassembled. Change the belt in case the belt is cracked.
5. Washing machine water not draining
Lifting the top only to find clothes floating in dirty water is the most common unpleasant experience. A drainage issue can cause this with the washing machine. Therefore, repair the washing machine at home and address the drainage problem.
- A piece of clothing can obstruct the pump in your washing machine. Drain the water with a kitchen measuring cup, then unplug the appliance. Remove the front screws. For simpler access to the water pump, tilt the machine up. If so, gently twist and remove the piece from the pump with pliers.
- In addition, the corrugated tubing leading to the pump may have a blockage. Open the tube’s clamp. This tube will be filled with water, so have a bucket or container handy. Remove the water. The end of the hose is typically where a blockage will be found if there is one. With pliers or by hand, remove it.
Conclusion
Make sure the washing machine is always in the greatest shape because it is one of the most important home electronics. For washing machine repair at home, refer to the “how to fix washing machines” guide. For bigger problems, you take help from professional service providers like Mygate home services, who send experts to solve all machine problems.
A hair spa treatment may help with everything from frizziness to dandruff removal. Hair spas are beneficial for every hair type and are highly recommended to hydrate and cleanse your hair every few weeks. We all detest frizzy hair, and the most effective approach to restoring damaged hair is a hair spa treatment. A soothing natural hair spa at home involves a head massage to help enhance blood flow to your scalp. It also infuses required nutrients to your hair strands, which help hydrate your hair, leaving it looking soft and frizz-free.
5 steps to follow for a hair spa at home
Here is the breakdown of hair spa procedures to give you more understanding of the entire process:
1. Massage your hair and scalp with oil
This is one of the most important hair spa steps. Start with a basic oil massage to nourish your hair while stimulating blood flow and improving circulation in your scalp. If you like, you may heat the oil slightly and do a hot oil massage. Take around 1-2 teaspoons of heated oil in your palms and carefully massage it from root to tip. Your choice of oil is influenced by your hair type and any hair issues you may have. Cold-pressed oils are strongly recommended because they contain vital antioxidants, vitamins, and minerals normally lost during extraction.
2. Steaming
This step of the hair spa process is similar to a facial, except that the steam is focused on your hair. This helps the pores on your scalp expand, allowing the oil previously applied to your scalp to be absorbed.
3. Shampoo hair to wash out the oil
It is time to wash your hair and rinse it. It is strongly advised to use a Sulfate-free shampoo, which effectively cleanses your hair from within without depriving it of its natural moisture. When shopping for shampoo, avoid compounds like Sodium Lauryl Sulfate (SLS). With shampoos, less is more, so dilute it with water, rinse, and repeat! A clean shampoo may not foam much, but it properly washes and moisturizes your hair.
4. Deep condition with hair spa cream
This step of the hair spa process will help you understand how to use hair spa cream at home. A hair mask is also known as an intense conditioner or a deep conditioning treatment because it has a high concentration of active substances that are particularly useful after extended contact and allow nutrients to absorb and work their magic. For optimum results, leave the mask for 20-30 minutes before rinsing with lukewarm/cold water.
There are many hair spa creams available on the market. Some of the best hair spa creams for hair spa treatment are as follows:
- Schwarzkopf BC Bonacure
- Wella Brilliance Treatment for Colored Hair
- The Body Shop Rainforest Radiance Hair Butter
- Wella Enrich Moisturizing Treatment
- Schwarzkopf Spa Essence Hydrating Cream Masque
- Wella System Professional Hydrate Dry Hair Mask
- L’Oréal Total Repair 5 Hair Masque
5. Final rinse
Wash the mask off by gently rinsing your hair with warm water. After that, apply the conditioner and rinse it away. Follow up with conditioner, then rinse the conditioner out. If you like to give your hair more care, you should always go for deep conditioning. This is essentially to rehydrate and strengthen your hair. There are several products for deep conditioning available online or in the shops. You can pick any of these products. Make sure you cover your hair with a shower cap after applying conditioner. Wait for around 10 minutes. There are a few deep conditioning products that need the use of a blow-dryer. So, follow the given instructions properly. Wash thoroughly after the mentioned time.
Home remedies for hair spa
Here are some homemade hair spa treatments that can be easily made at home using some of our daily use kitchen ingredients. You can follow the steps and make hair spa cream at home if you wish to avoid buying hair products.
1. Avocado & Honey
This hair spa treatment is ideal for moisturizing and softening frizzy and damaged hair. We all know avocados are high in omega-3 fatty acids. They also contain amino acids. These two acids make avocados a wonderful component for moisturizing and boosting the texture of your hair. Honey is a great natural conditioner that can help to rejuvenate damaged hair.
How to make this mask?
- Peel two avocados (the number depends on your hair’s length and thickness) and place them in a mixing bowl.
- Mix them with honey until it becomes a smooth, creamy paste.
- Apply this paste properly to your hair.
- Once applied, use steam for approximately 10 minutes.
- Keep it on for 20 more minutes.
- Use lukewarm water to wash with a mild shampoo.
2. Coconut cream
Coconut cream contains fatty acids, vitamins like E, C, B1, and B6, and minerals such as calcium, phosphorus, iron, magnesium, and selenium. If your hair is damaged due to UV rays and heat, this hair spa treatment is definitely for you. The coconut oil in this mask also improves the condition of your hair.
How to make this mask?
- Put coconut cream (approximately half a cup) in a glass or ceramic bowl.
- Steam for 10 minutes, then leave for another 10 minutes.
- Next, apply the coconut cream thoroughly and let it stand for a minimum of an hour.
- Wash with water and use a gentle shampoo.
3. Beer
If you have dull and lifeless hair, washing with beer is an excellent technique to regain the shine. Chemicals present in beer can help in toning and mattifying a greasy scalp, giving your hair life. Beer’s yeast component helps to smooth rough and dull hair as well.
How to make this mask?
- Take a glass bowl and pour the contents of a bottle of beer.
- Let it sit overnight to allow the beer to flatten.
- Steam your hair in the morning and wash it with a soft shampoo.
- Don’t use conditioner; bathe your hair with the beer and massage for a few minutes.
- Once done, rinse with cold water.
4. Cucumber
The cucumber hair mask is a refreshing and soothing hair spa component that is suitable for all hair kinds.
Cucumber contains sulfur and silicon, which relieve scratchy and irritated scalps. It also provides nutrients to dry hair. Cucumber can also help stop hair loss and promote new growth.
How to make this mask?
- To make the mask, use finely sliced cucumber and olive oil and blend these to create a soft, foamy paste.
- Steam for 10 minutes, then allow it to stand for another 10 minutes.
- Apply the paste thoroughly to your hair and scalp and leave it on for 15 minutes.
- Use lukewarm water and gentle shampoo to clean.
So, these are a few ways how to do hair spa at home. However, following all these steps properly is not an easy task. And this is why we prefer visiting salons and getting it done by professionals. But what if you can get all of these hair spas at home? Especially after a long tiring day, getting a good hair massage and hair spa not only improves our hair quality but leaves our minds refreshed.

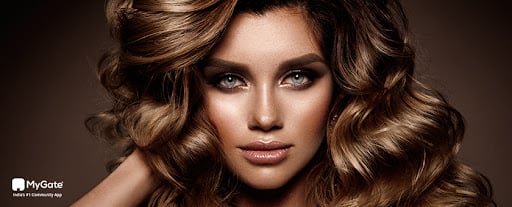
Let’s talk about hair! Do you want to become a dyeing sensation with Indian skin tone? Here is the hair colour for brown skin. Brown is the latest trending hair colour. But why brown hair colour shades for brown skin?
Brown is stunningly gorgeous, but red is alluring, black is mysterious, and the blonde is, well, blonde. Brown hair colour hues are the best option for anyone who wants to make themselves seem different without undergoing significant life adjustments. Because of its modest elegance, it is likely to appeal to ladies looking for something delicate and discreet in their daily lives. It brings out the gorgeous dusky look of Indian women.
The more browner your hair, the more attention you get.
Our selection of brown hair colour tones for every Indian skin type includes options suitable for everyone. After determining the undertone of your complexion, proceed to our curated collection of brown colours to identify your ideal brunette character.
Explore the brown hair colour shades suitable for people with Indian complexion.
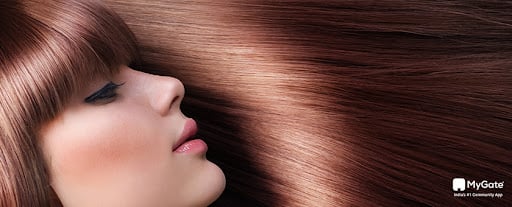
Brown hair colour shades: 1. Light brown
Light brown hair colour for Indian skin tone takes the hair dyeing to the next level.
Brunettes are full of electricity. Do you want to appear like a brunette for the day? If that’s the case, you should go with this colour. It is a popular and neutral kind of light brown that works wonderfully with all of the many undertones of human flesh. It has the perfect balance of darkness and lightness, and its overall appearance is spot on.
Brown hair colour shades: 2. Dark brown

Dark brown is the recommended brown hair colour shade for Indian skin tone.
It is an easy-to-use yet powerful black hair colour for Indian hair and is ideal for concealing all your grey hair and other hair defects. To give your dark brown hair depth and personality, you may also apply a few touches of golden lowlights in strategic places.
Brown hair colour shades: 3. Golden brown

Golden brown is a brown hair colour shade that works well with the Indian skin tone.
Brunettes do it better and with Golden browns, they almost always look magnificent. It is a warm colour, and those with warm skin tones and brown eyes appear particularly stunning when they wear it. Subtle golden highlights may also create a sun-kissed appearance with this hair colour. This will give the impression that the sun has kissed your hair.
Brown hair colour shades: 4. Caramel brown

Best hair colour for Indian skin tone: Caramel brown.
If caramel popcorn is one of your go-to snacks for a night at the movies, but you’re ready for a change, why not try dying your hair the same colour? You love caramel; so does your hair. The colour caramel brown is a delectable combination of the mahogany and golden-brown tones, and it flatters ladies with complexion tones ranging from dark to light equally well.
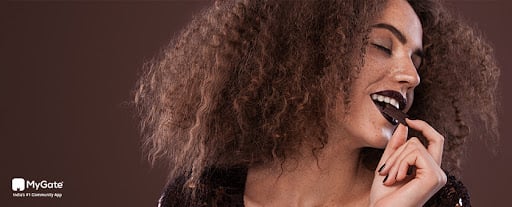
Brown hair colour shades: 5. Chestnut brown

People will be (chest)nuts about this brunette in you. Warm tones such as dark brown, caramel, and golden brown come together to create the gorgeous colour combination known as chestnut brown. It has a rosy undertone that gives it an air of refinement and elegance unmatched by any other colour. It is the best option for folks with cool undertones to their complexion.
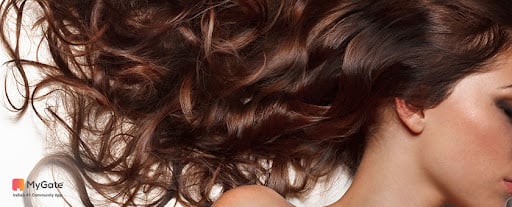
Brown hair colour shades: 6. Mahogany brown

We didn’t know that you looked better with brown hair. If you’re searching for some edgier tones of brown in your hair colour, then this shade of brown could be the ideal option. It is a stunning hair colour that mixes a richer shade of brown with a hint of reddish undertones and works very well with cool skin complexions. You might also experiment with burgundy to bring out the red undertones.
Brown hair colour shades: 7. Ash brown

Hair colour for Indian skin tone- Ash brown
Learn the new language of hair colour, and that is ash brown. This unique hair colour, ash brown, is on the border between blonde and brown. Due to their cool grey undertones, your tresses will have more dimension and volume. If you have warm skin undertones and are seeking a hair colour that balances out the yellows in your complexion with a cooler hue, you need to try this one.
Brown hair colour shades: 8. Cinnamon brown
Cinnamon brown is a great choice of hair colour for Indian women.
Cinnamon brown is a new take on the traditional brunette hair colour, characterised by a delicious combination of milk chocolate and daring red accents. You can bring this hair colour to life by combining it with auburn highlights in a balayage manner, with a dark brown colour as the foundation colour. This will further accentuate the red tones in the hair colour. Your choice of cinnamon brown will make everyone say brunettes do it better.
Brown hair colour shades: 9. Red brown

Reddish-brown is the best hair colour for Indian skin tones.
Are you unsure about the difference between browns and reds? What about having both of them? This hair colour is an excellent illustration of how you can combine different shades of red and brown naturally and seamlessly. In addition, it provides a diverse range of variants for you to explore and play about. Those with lighter complexion should choose redder tones, while those with darker or tanned skin should choose more brownish shades. Be brown and beautiful!
Brown hair colour shades: 10. Iced chocolate brown
A different hair colour for Indian skin tone—Iced chocolate brown
Looking for highlights in your hair colour done by a professional that complements Indian skin? Iced chocolate brown colour highlights are the best. It is a hair colour that looks good on people of different complexion tones. This neutral tone will look stunning on those who have hair that is a rich chocolate brown colour. it reminds you of the hot chocolate brownies that melt in your mouth. You will melt the hearts of the people with one of these exotic brown hair colour shades.
Brown hair colour shades: 11. Copper brown
Hair colour shade for Indian skin tone- Copper brown
This magnificent shade of copper brown is the one colour that has the potential to make your tresses appear thick and full of volume. This shade of hair colour is flattering for people of different complexion tones, but it works incredibly well for individuals whose natural hair colour is brown. You will feel like you’ve always been a brunette once you’ve seen one of these brown hair colour shades.
Brown hair colour shades: 12. Mushroom brown (english)

Mushroom brown is one of the best hair colours for Indian skin tone.
Among the several hues of brown hair, many people consider mushroom brown one of the most attractive colours. It is a colour you can describe as between brown and grey. This super-chill hair colour gives people with warm skin tones an edgy appeal, and it looks best when it’s coupled with an ombre. Show your Braun with this brown and stand apart from the rest.
Brown hair colour shades: 13. Toffee brown

Toffee brown is the recommended hair colour for people with an Indian skin tone.
Who doesn’t like toffee? This stunning shade of light brown hair colour is known as “delicious,” and it’s easy to see why. It brings out the best in those who have chilly undertones to their skin.
These few different brown hair colours go well with Indian skin tones. If they inspire you, give them a go; we promise you won’t regret it! After colouring your hair, you must take proper care of it by utilising hair products appropriate for coloured hair.
11 Blonde Hair Color Shades for Indian Skin Tones
Loreal Hair Color Chart :Top 10 Shades for Indian Skin Tones
13 Burgundy Hair Color Shades for Indian Skin Tones
About MyGate
MyGate is India’s largest society management system, benefiting thousands of housing societies, developers, society facility managers, and millions of homeowners in every Indian city.
Home Services