
We want to first thank you for letting us be a part of your life and giving us an opportunity to serve your society and you. We understand that we are custodians of your information and we treat it with utmost confidentiality.
In the last few days, it has come to our attention that other companies who claim to have a similar product like MyGate are adopting unethical and unprofessional practices like:
- Entering the society stating that they are from MyGate. I recommend that you ask your security staff to check for ID from anyone claiming to be from MyGate before letting the person enter the premises.
- Misrepresenting MyGate’s capabilities, features and solutions. MyGate comprehensive suite of modules and features are listed here for your easy reference.
- Calling our clients and claiming that they got the number from MyGate. I assure you that we do not share the data with any third party. Please share the phone number, name and the company name of the person who states that they got your number from us at [email protected]
Thank you for your continued support and trust in us.
Written by Divyanshi Bhamri, QA Engineer at MyGate
1. Why Performance Testing?
Performance testing is mainly used to measure the speed, response time, reliability, resource usage and scalability of application under an expected workload. The primary purpose of conducting such a test is to surface performance related issues within the application. Findings from this exercise must be shared with engineers to aid in improving overall usability of application.
In this series, as part of performance testing guide we will focus on the following parameters;
- Speed: Determines whether the application responds quickly.
- Scalability: Determines maximum user load the software application can handle.
- Stability: Determines if the application is stable under varying loads.
2. Introduction to Locust
Locust is an open source performance testing tool [1] which allows you to write performance test scripts in Python. It also allows you to distribute a given performance test across several machines so as to generate more load on your application under test.
2.1 Advantages
- Simple documentation.
- Support python language.
- Locust comes with an embedded web-based user interface (in HTML and JavaScript) that displays test data in real-time.
- Distributed and scalable. Supports hundreds of thousands of users.
- Low entry barrier. It is possible to begin testing with basic programming skills.
2.2 Installing Locust
Note: Being a python application, Locust supports both 2.x and 3.x python versions. Installation is pretty straightforward Python with versions 2.7, 3.5, 3.6, 3.7, and 3.8 to choose from. Locust official recommends to work with the 3.x version [2].
Step 1: Download Python version 3.7 (https://www.python.org/downloads/windows/)Step 2: Add Python 3.7 to the path.
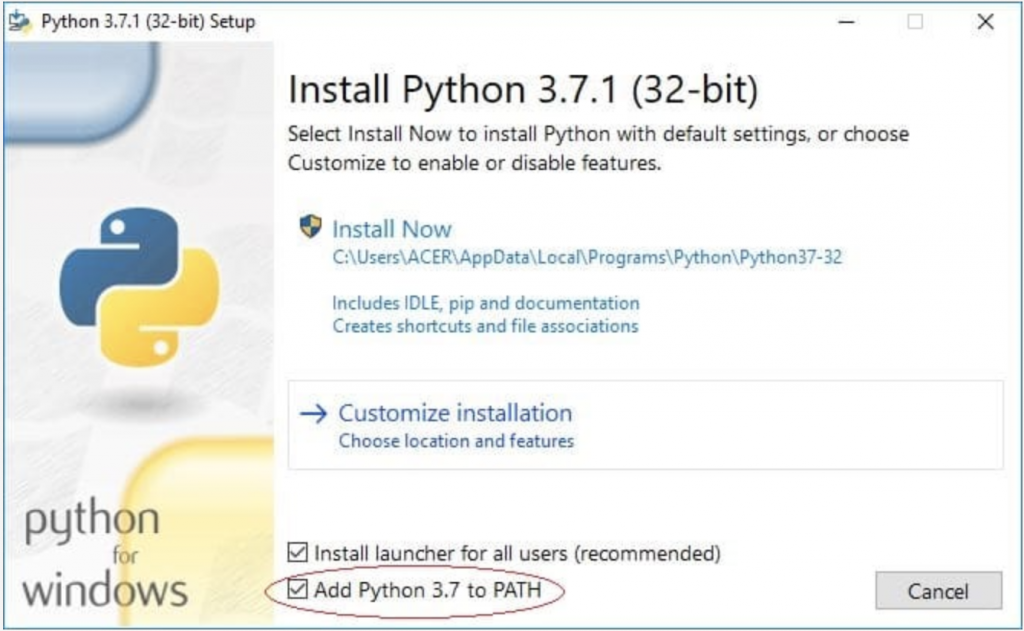
Note: By default, “Add Python to PATH” option is unchecked. Make sure it is checked and then click on Install Now. If the setup is successful, you should see a window as below.

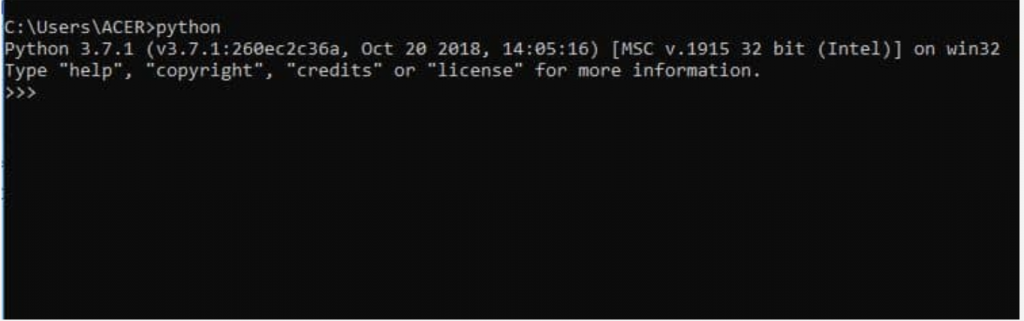
Step 3: Now let us check if Python is successfully installed. Open command prompt and type “python” on it. You should see something like this.
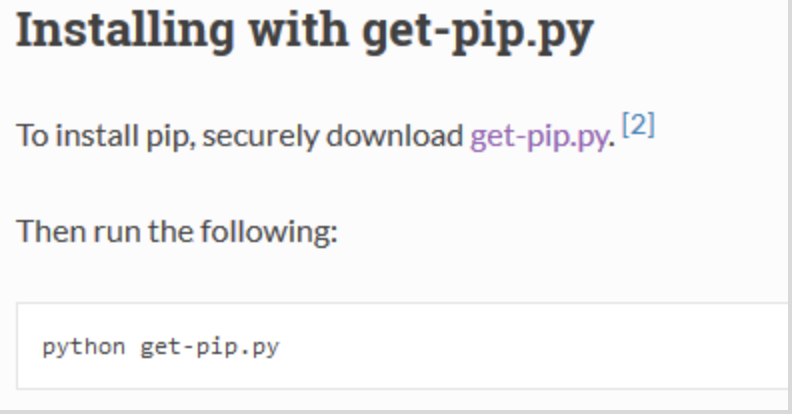
Step 4: Let us install pip. Go to the URL https://pip.pypa.io/en/stable/installing/ and save get-pip.py file. Run the following command.
python get-pip.py
Step 5: Now it is time to add pip to environment variables.
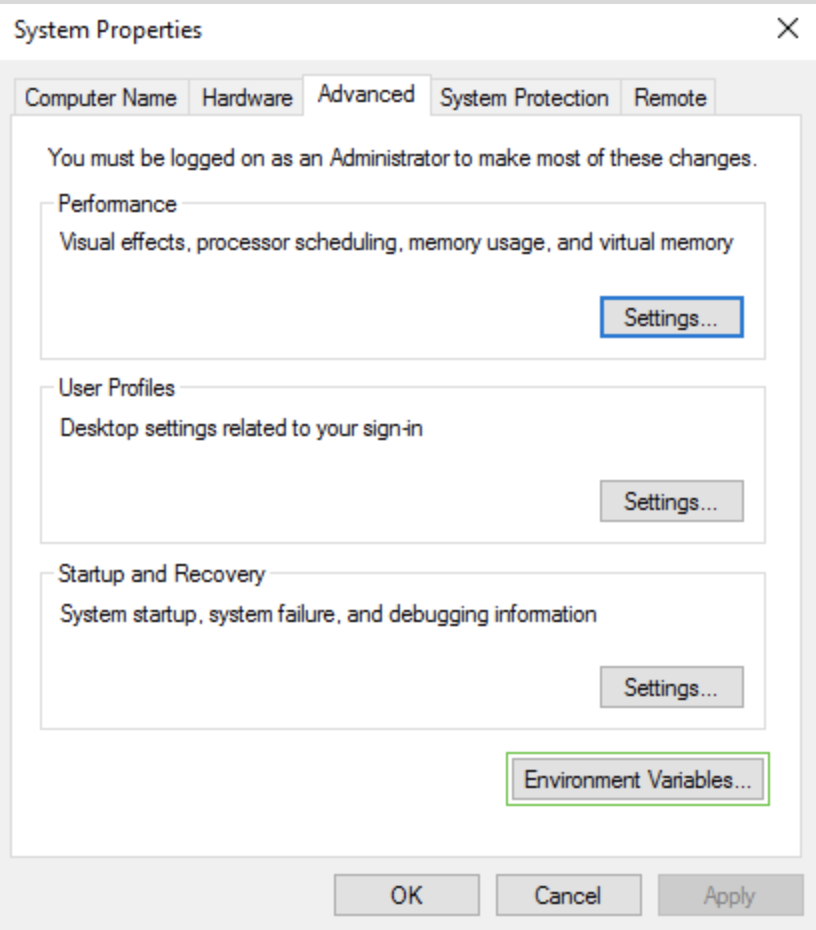
Set a path variable.

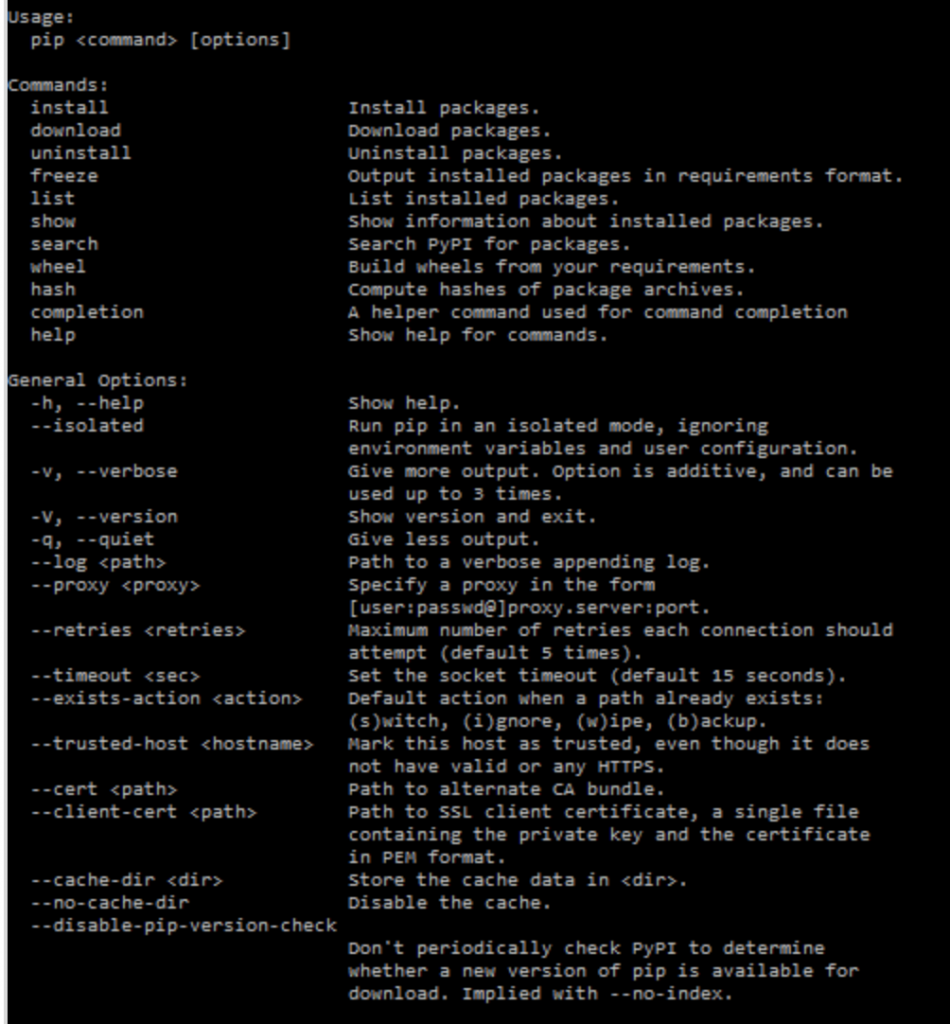
Step 6: Open command prompt and type pip. You should see the usage list which confirms that pip is successfully installed.
Step 7: Run the following command to install locust.

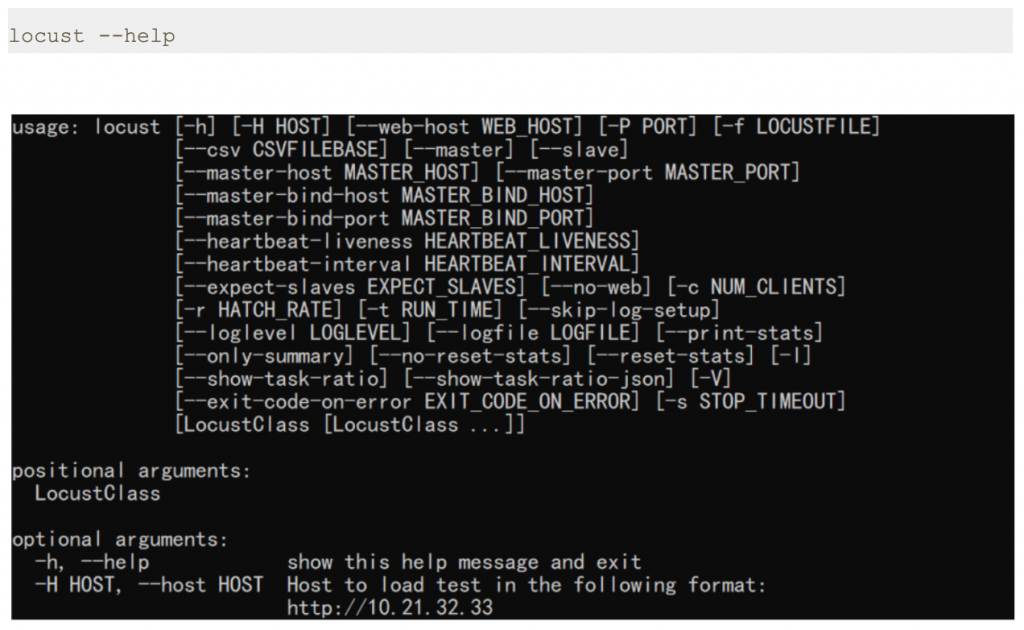
Step 8: Once you are done, you can test Locust installation by running the following command.
3. Conclusion
This is the first article of its series. In the next post we will learn more about how to use Locust and Python scripting for performance testing.
Thanks for reading. I hope this article equips you with basic knowledge of Locust installation.
References
[1] Locust – An open source load testing tool.
https://locust.io/
[2] Locust – Installation
https://docs.locust.io/en/stable/installation.html
Disclaimer
This is a curated post of an article published at Medium.
Written by Divyanshi Bhamri, QA Engineer at MyGate
1. Introduction
Hello again. This is the second article of a series on performance testing with Locust. I strongly suggest that you take a look at part 1 of the series so that you are ready with environment setup.
Note: As a prerequisite, you need to be familiar with Python to create test scripts.
It is time to familiarise ourselves with few Locust centric attributes [1].
2. TaskSet
Class defining a set of tasks that a Locust user will execute is known as TaskSet. When a TaskSet starts running, it will pick a task from the list of activities marked with a task attribute, execute it, and call its wait_function which defines a time period to sleep. This defaults to a uniformly distributed random number between min_wait and max_wait milliseconds. It will then schedule another task for execution and repeat the process.
3. HttpLocust
For making HTTP calls, we need a class that inherits from HttpLocust. Here we can define other attributes, such as min_wait and max_wait as required.
Note: min_wait and max_wait can be defined in classes inherited either by TaskSet or HttpLocust. In our example we will be defining these attributes at class inherited by HttpLocust.
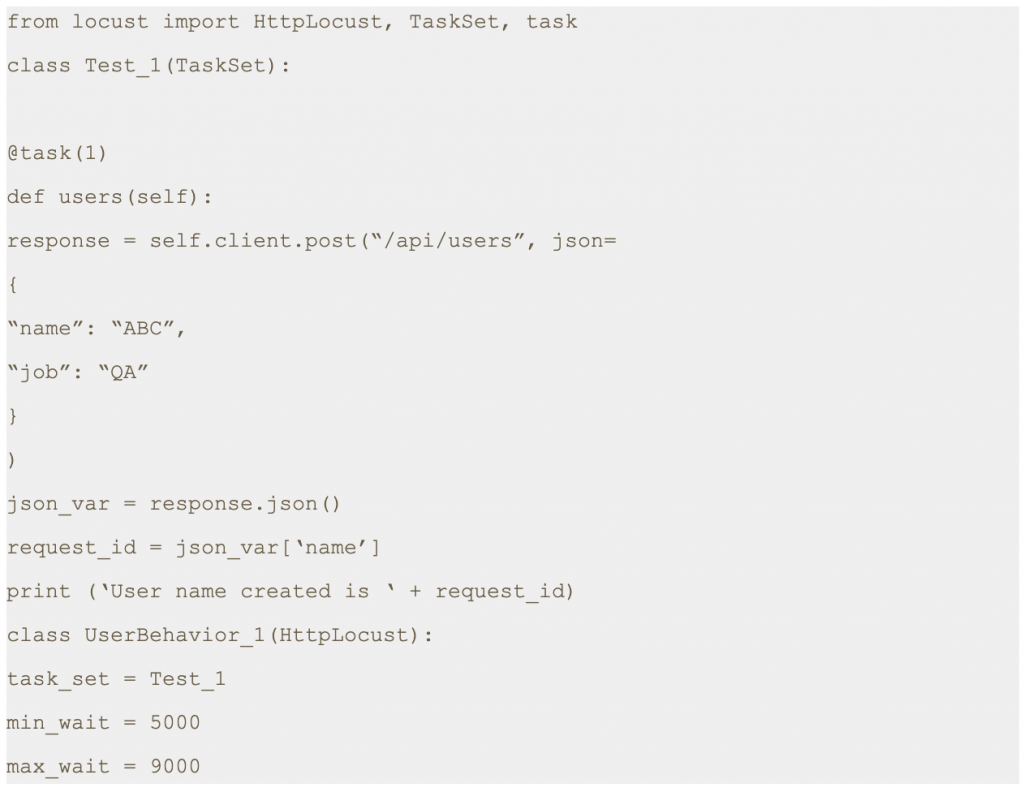
Step 1: Save this script with .py extension. I have saved this script as locusthello.py.
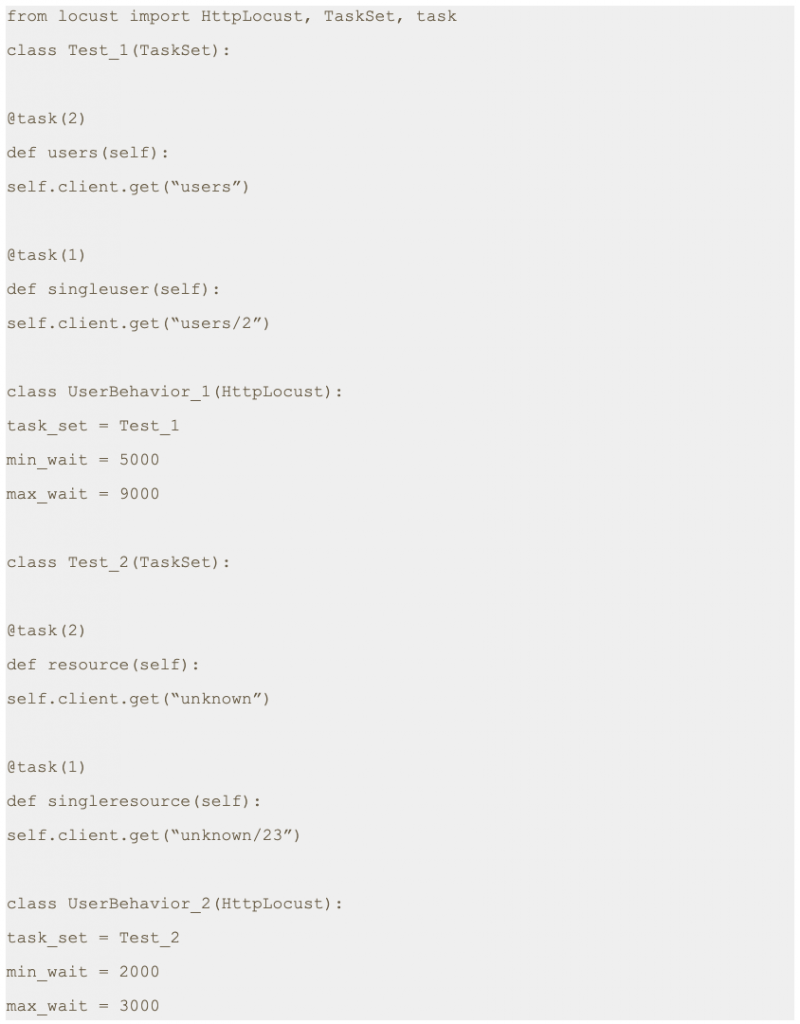
Note: In this script we are making four different GET requests to four different end points. But one of the main variables which is missing is the domain name. We will pass the domain name while running the test script from the command line with -host parameter.
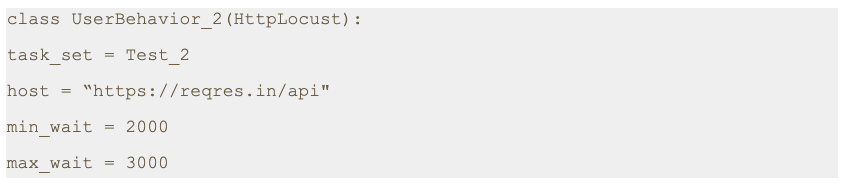
If required, we can just add a host variable within class as shown below.
4. Script execution
Step 2: Run the following command.

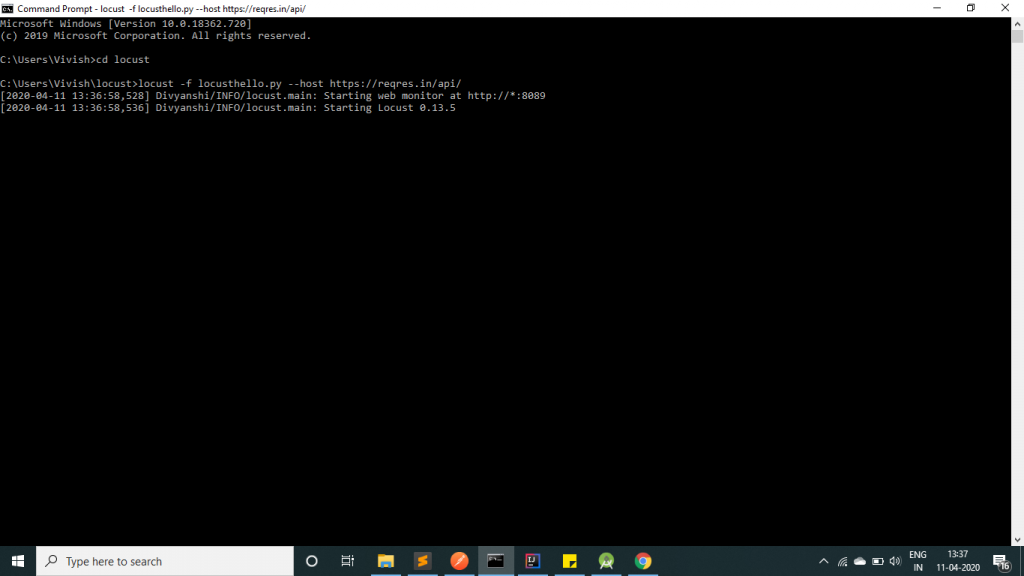
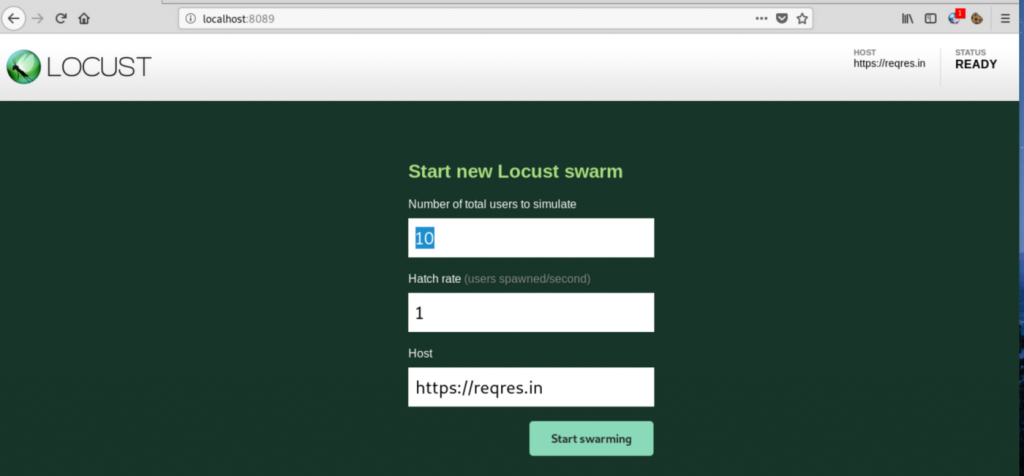
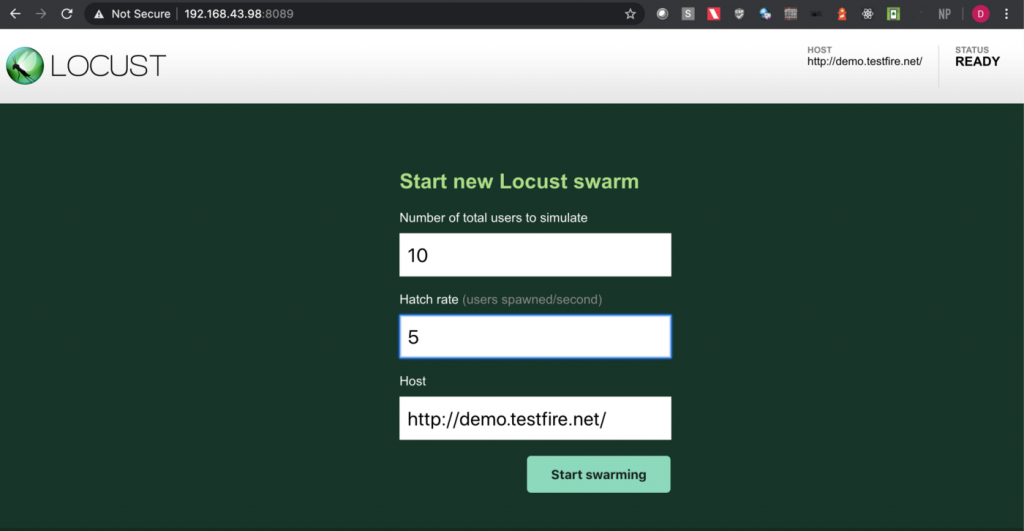
As you can see in the image, the server has been started at port 8089.Step 3: Open a browser and navigate to http://localhost:8089
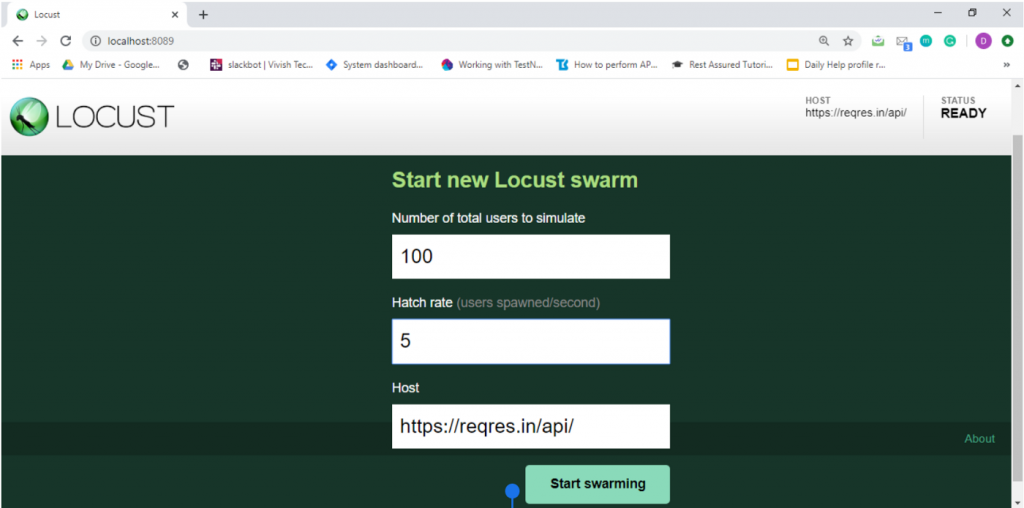
Once the page loads, you will notice two input text boxes. You need to set the maximum number of users to simulate and hatch rate which indicates ramp-up rate. I have set a configuration of 100 users with a hatch rate of 5. This translates to adding 5 users to the pool at a time until we reach 100 users. Click on submit.
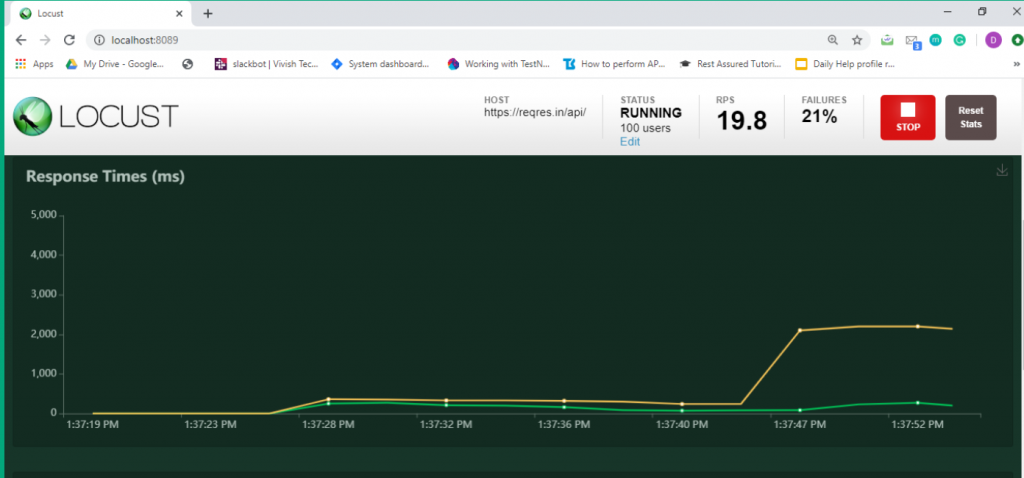
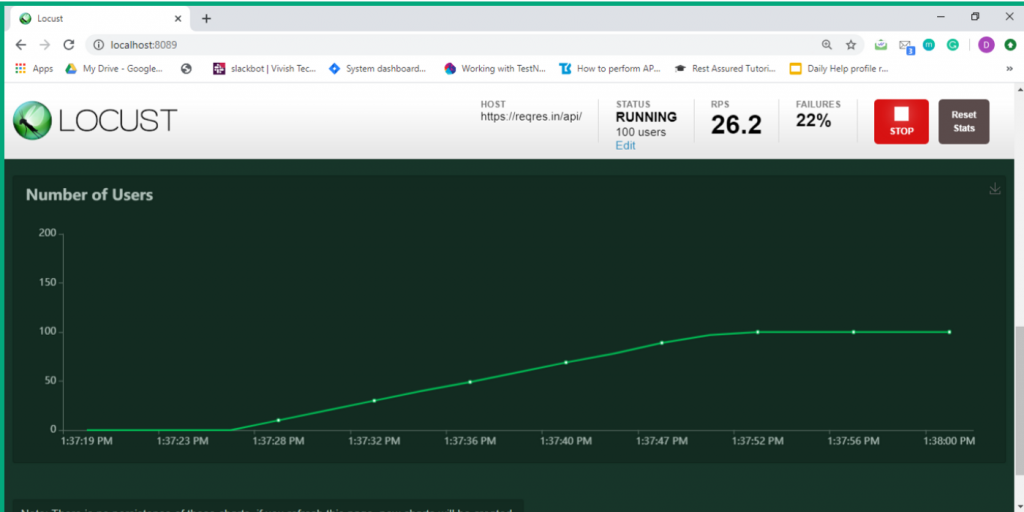
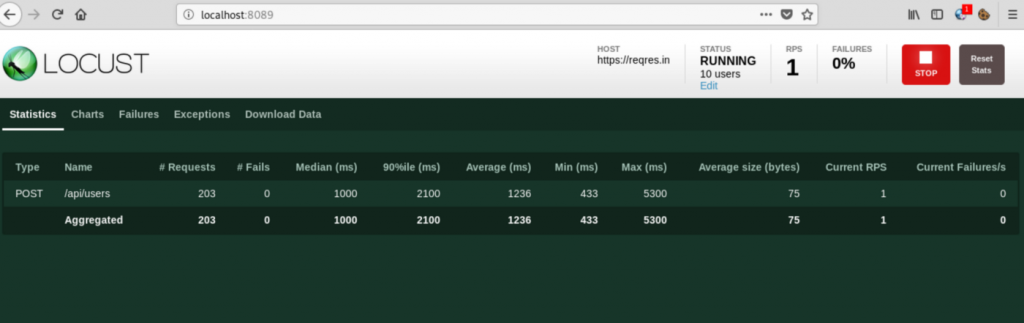
Step 4: The test process starts automatically and you will see results flowing in immediately.

Step 5: Now click on the charts tab. You can inspect different categories of charts such as total request/ second, response time and number of users.

5. Conclusion
This is the second article of its series. In the next post we will learn about how to send POST requests.
Thanks for reading. I hope this article helps you trigger GET requests.
References
[1] Locust Documentation
https://docs.locust.io/
[2] Mock API
https://reqres.in/api
Disclaimer
This is a curated post of an article published at Medium.
Written by Divyanshi Bhamri, QA Engineer at MyGate
1. Introduction
Hello again. This is the third article of a series on performance testing with Locust. I strongly suggest that you take a look at part 1, 2 of the series so that you are ready with environment setup and basic script knowledge.
By now you should be familiar with issuing GET requests to an endpoint using Locust. Today I will be speaking about how to make a POST request and extract a response.
The primary difference between a GET and POST request is that the latter is accompanied with a content body. This content can be JSON data, form parameters or multi-form data.
Note: We are going to use jsonplaceholder [2] and reqres [3] restful web services to demonstrate our examples.
2. Case: Making POST request with JSON body
In this scenario, we will make a POST request to /api/users at https://reqres.in along with the following JSON body.

Step 1: Save this script with .py extension. I have saved this script as today2.py.
Note: First, you need to assign a response to the output of the POST request. Second, you should convert the response body to a JSON string. Finally, you should extract the desired value by using a JSON expression.
The last line is going to print the result on the terminal. It is optional.
Step 2: Run the following command.

Step 3: Open a browser and navigate to http://localhost:8089
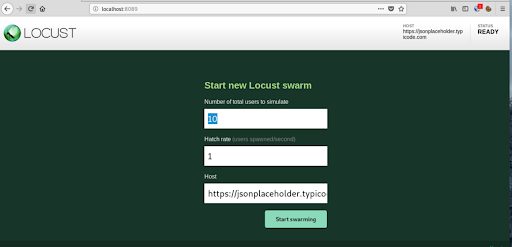
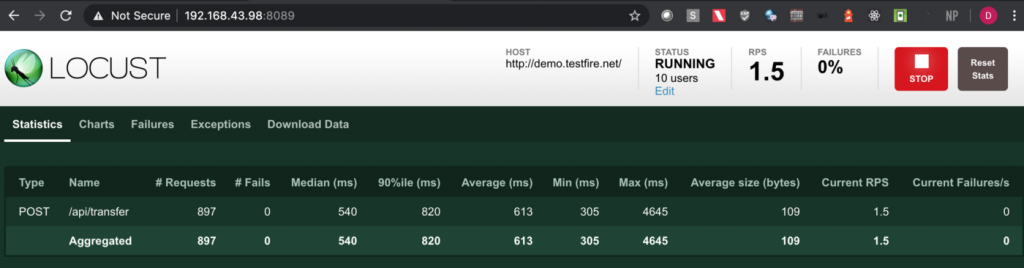
Step 4: Once the page loads, enter the number of users and hatch rate. Click on the ‘Start swarming’ button.
Step 5: Check Locust UI. The test process should have started automatically.
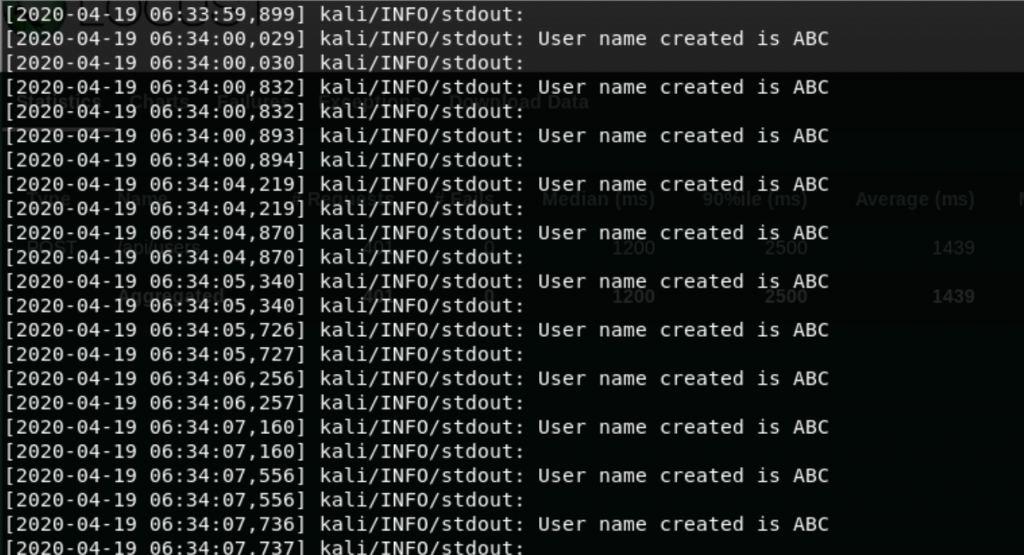
Note: In the script shared above we have printed a response attribute which is part of the sent request. This prints the name of the user as shown in the console.
3. Case: Make POST Request with Form Data
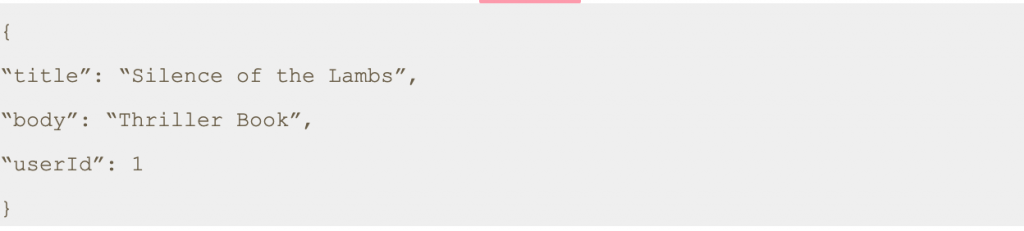
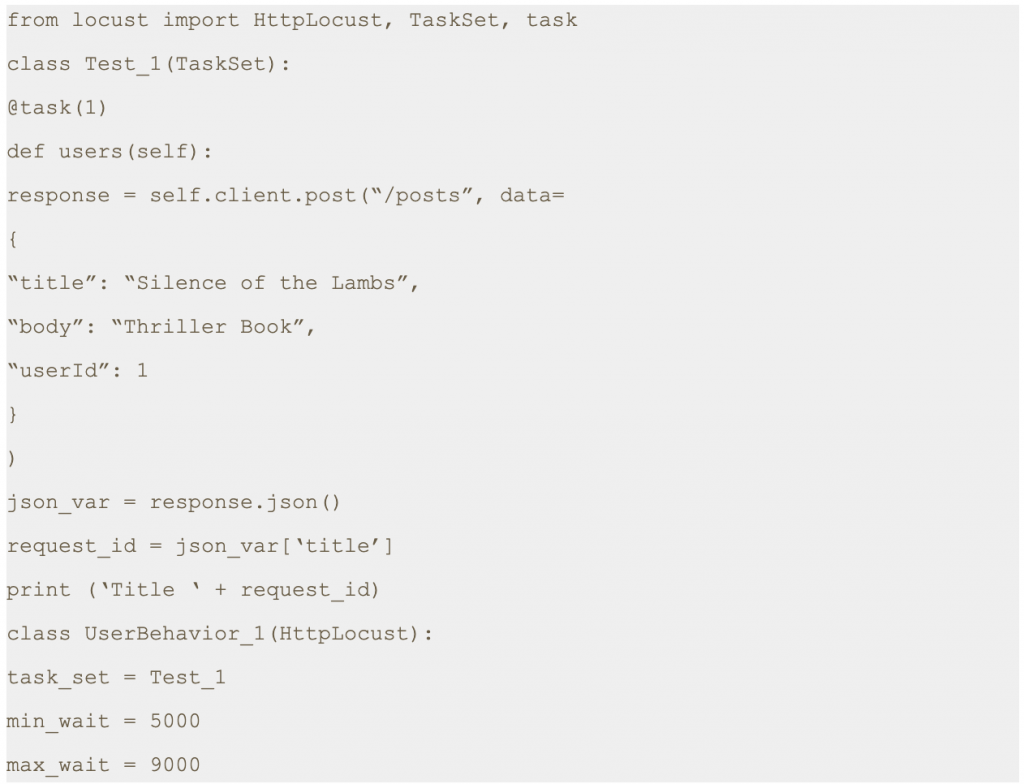
In this scenario, we will make a POST request to /posts at https://jsonplaceholder.typicode.com with following form data.
Step 1: Save this script with .py extension. I have saved the file as today3.py.
Step 2: Run the following command.

Step 3: Open a browser and navigate to http://localhost:8089
Step 4: Once the page loads, enter the number of users and hatch rate. Click on the ‘Start swarming’ button.
Step 5: Check Locust UI. The test process should have started automatically.
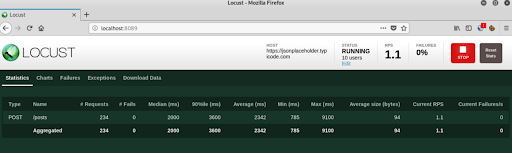
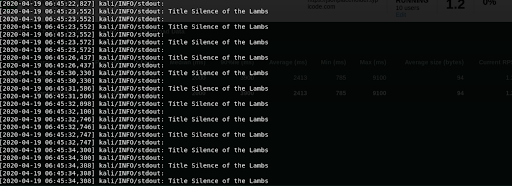
Note: In the script shared above we have printed a response attribute which is part of the sent request. This prints the title as shown in the console.
4. Conclusion
This is the third article of its series. In the next post we will learn about how to send authenticated requests using locust.
Thanks for reading. I hope this article helps you trigger POST requests.
References
[1] Locust Documentation.
https://docs.locust.io/
[2] Mock API
https://reqres.in/api
[3] Fake Online REST API for Testing and Prototyping
https://jsonplaceholder.typicode.com/
Disclaimer
This is a curated post of an article published at Medium.
Written by Divyanshi Bhamri, QA Engineer at MyGate
1. Introduction
Hello again! This is the fourth part of my series on performance testing with Locust. I hope you all enjoyed my previous posts.
In this article we will talk about sending the GET and POST authentication requests using Locust.
Note: We are going to use hosts similar to reqres [1] restful web services to demonstrate our examples.
Authentication can be done in 2 ways such as:-
- Cookie based
- Token based
We will be covering token based authentications. Token can either be put in request headers or request body.
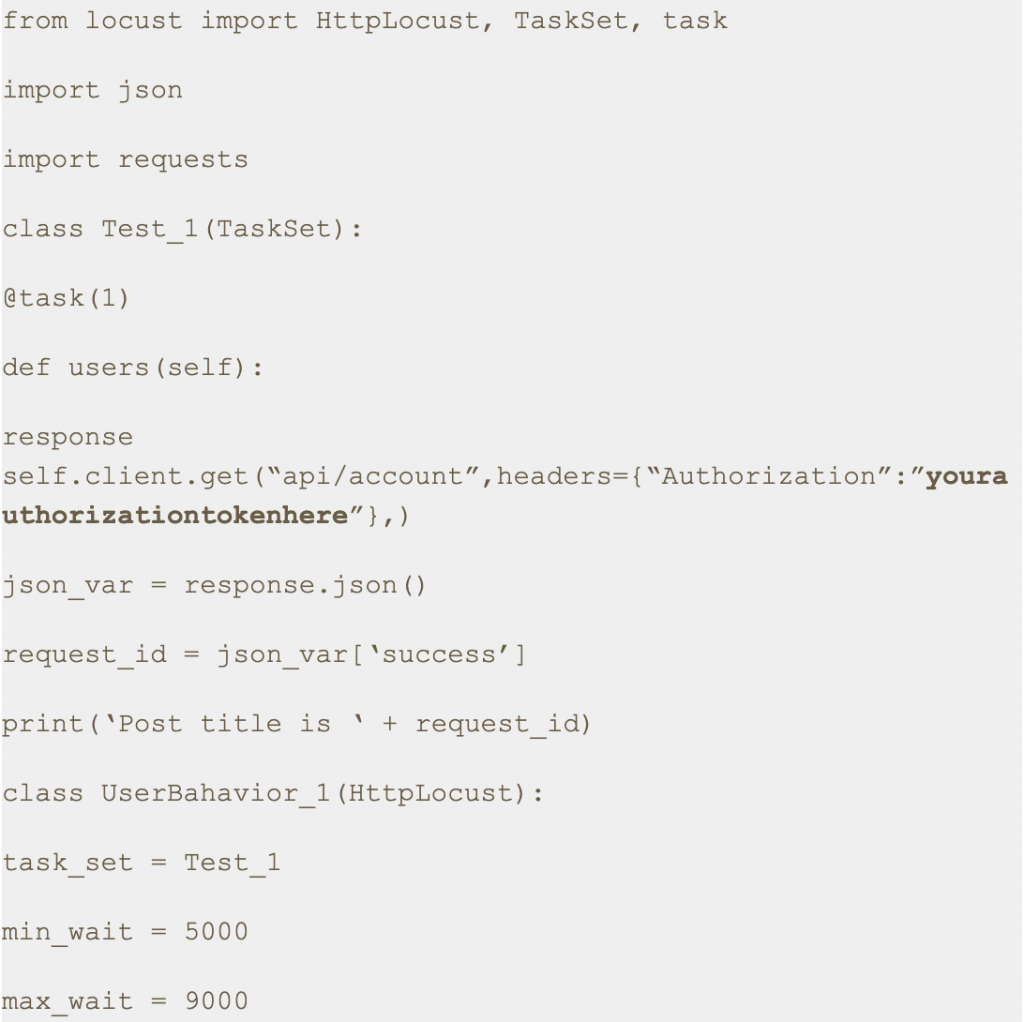
2. Case: GET Request Using Token in Request Headers
Note: For GET authenticate requests, a token can only be put in the request headers, since GET does not have any body.
We will be using https://demo.testfire.net/swagger/index.html, a swagger file which can be used to make an API request to a particular endpoint.
Try to grab the authorization token, using the swagger link mentioned above.
Step 1: Save this script with .py extension. I have saved this script as auth2.py.
Step 2: Run the following command.

Step 3: Open a browser and navigate to http://localhost:8089
Step 4: Upon opening the page, enter the number of users and hatch rate. Click on the ‘Start swarming’ button.
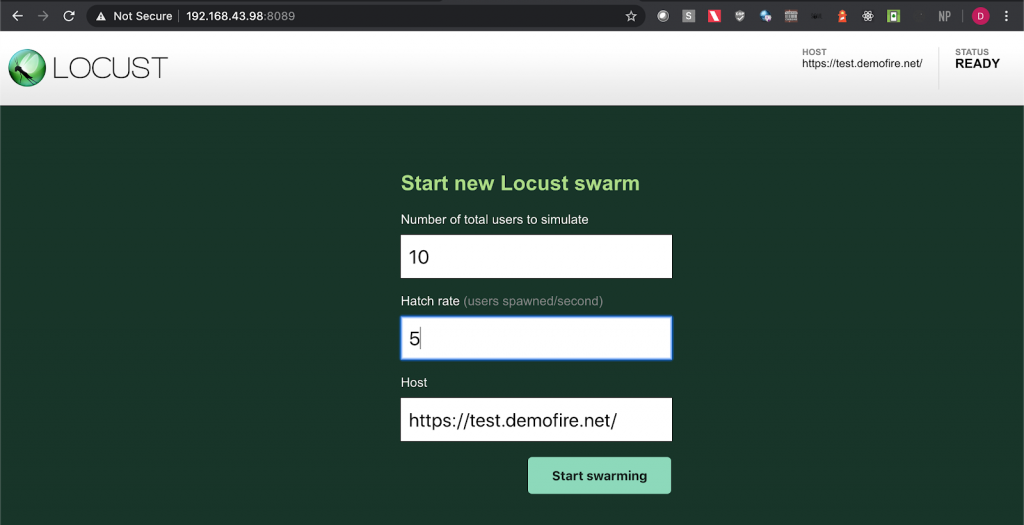
Step 5: Check the locust UI, in which the test starts automatically.
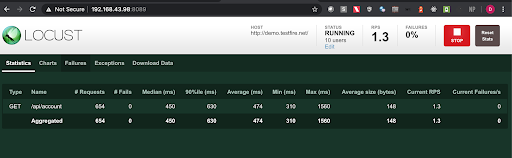
Note: In this approach we first get the authorization token using one of the api endpoints in the swagger file and then we put the same token in the headers section with the key ‘Authorization’ in the python script.
3. Post Request Cases
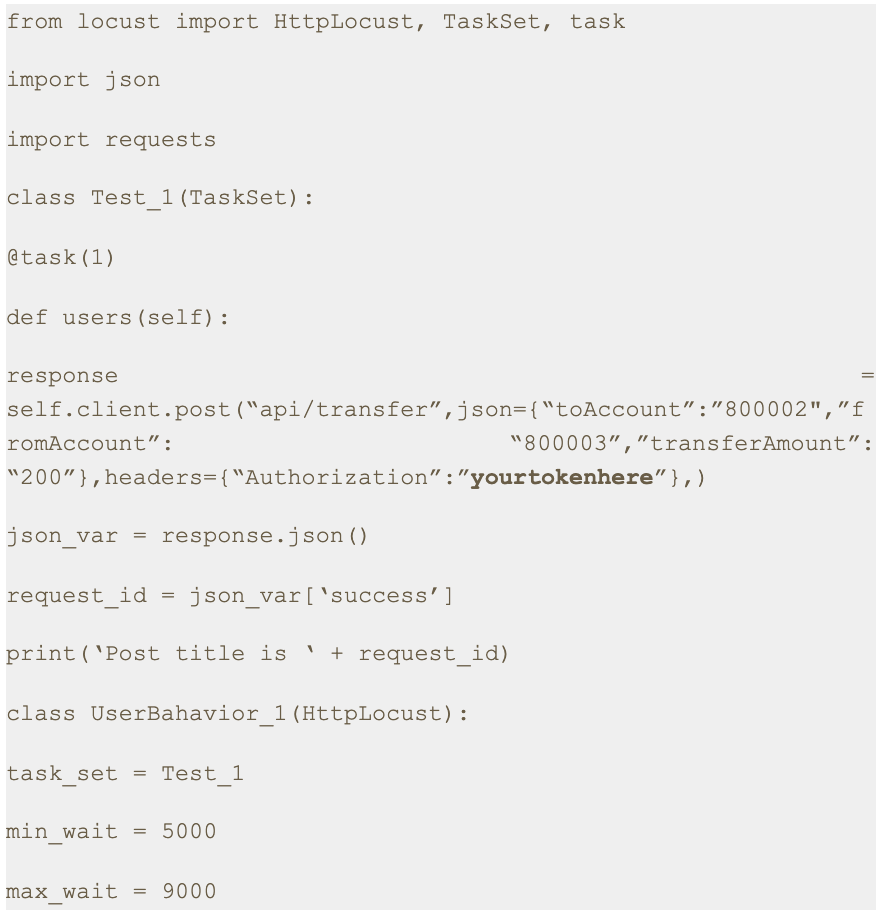
3.1. Case: Sending POST request with token in the Body Parameter
Step 1: Save this script with .py extension. I have saved this script as auth.py.
Step 2: Run the following command.


Step 3: Open a browser and navigate to http://localhost:8089
Step 4: Upon opening the page, enter the number of users and hatch rate. Click on the ‘Start swarming’ button.
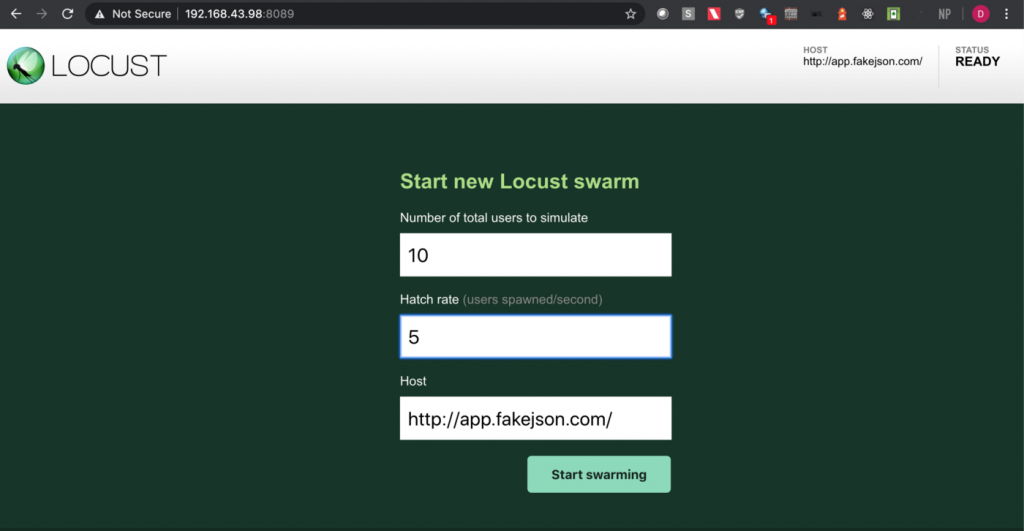
Step 5: Check the locust UI in which the test starts automatically.
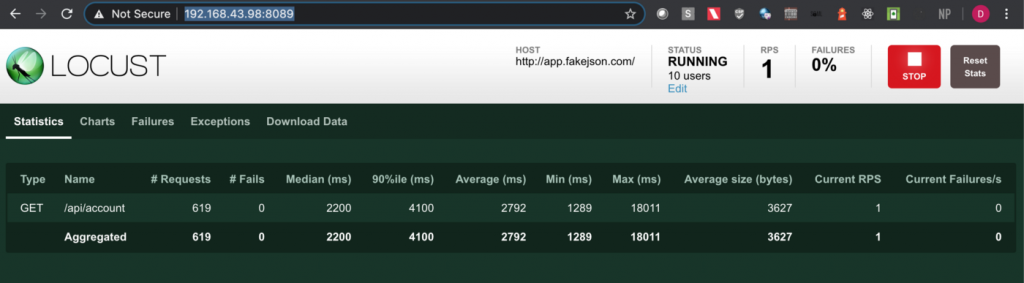
Note: I have used https://app.fakejson.com [3] for testing this endpoint. Just signup, get the token and replace the token field with yours. The token in this script is placed in the body parameter with the key set as ‘token’.
3.2. Case: Sending POST request with token in the Request Header
Step 1: Save this script with .py extension. I have saved this script as auth3.py.
Step 2: Run the following command.

Step 3: Open a browser and navigate to http://localhost:8089
Step 4: Upon opening the page, enter the number of users and hatch rate. Click on the ‘Start swarming’ button.
Step 5: Check the locust UI in which the test starts automatically.
Note: In this approach we first get the authorization token using one of the API endpoints in the swagger file and then we put the same token in the headers with the key set as ‘Authorization’ in the python script.
4. Conclusion
This is the fourth article of the series. In the next part we will learn about some more interesting aspects of Locust [4].
Thanks for reading. I hope this article provides you with a better idea about how to send an authenticated request for both GET and POST methods.
References
[1] Mock API
https://reqres.in/api
[2] Vulnerable Application
https://demo.testfire.net/
[3] Fake Online REST API for Testing and Prototyping
https://app.fakejson.com
[4] Locust Documentation.
https://docs.locust.io/
Disclaimer
This is a curated post of an article published at Medium.
Use Mygate Digital Notice Board, to easily & quickly share important updates, announce events and provide information to the residents. It is a single medium of communication for your community, and a source of truth for the residents.
Here’s how you will benefit…
– Send all critical announcements via a single medium of communication
– Avoid loss of crucial information on chat groups and emails
– Make verified information available to all residents
– Skip walking to the traditional notice board with paper notices
Latest Enhancements…
a) Notice via mobile: Send and share notices via the Admin app
b) Notice Print: Take printouts of the digital notice board
c) Add details: Upload images, gifs, thumbnail/cover images, enter a title, notice type, descriptions, add inline images, & embed URL in notice text
d) Share notices: Share the notice on your app with Non-Mygate users on WhatsApp or Telegram
How it works for the MCs…
A) Sending a notice via the Admin App
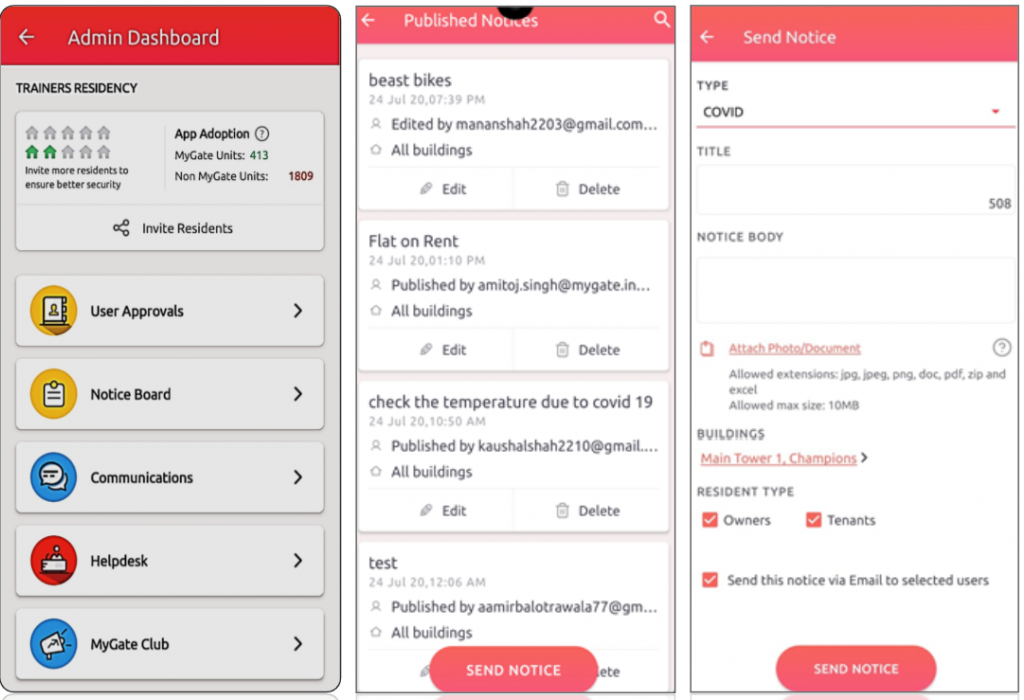
1. Go to the admin app and click on the admin console and then select Notice Board.
2. Admins can click on Send Notice to create a new notice. They can edit or delete old notices
3. Now select the notice type, the notice title (character limit is 70 characters), upload up to 5 attachments (one attachment of 20MB each).
4. Select the building details and resident type. The notice is ready, now click on Send notice.
B) Sending a notice via the Admin Dashboard
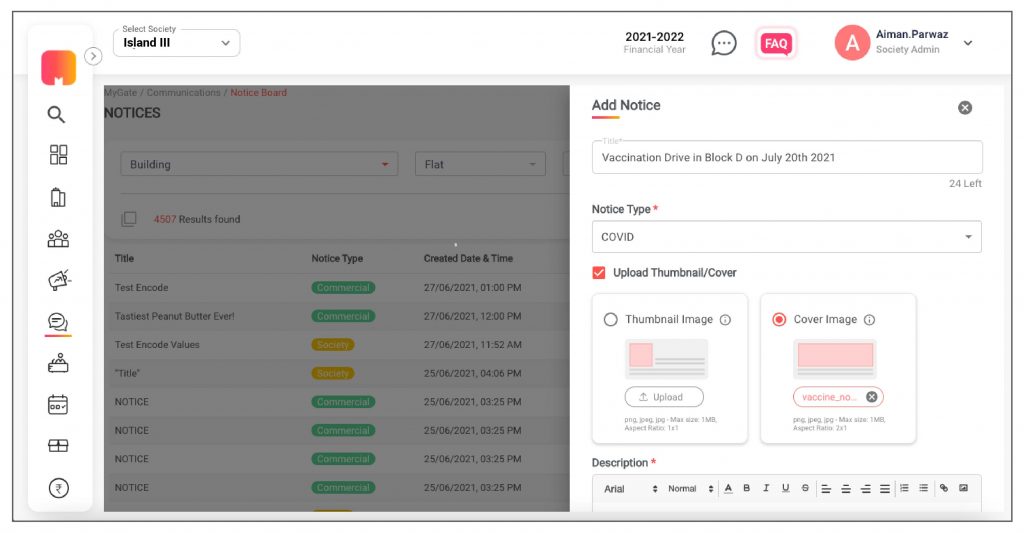
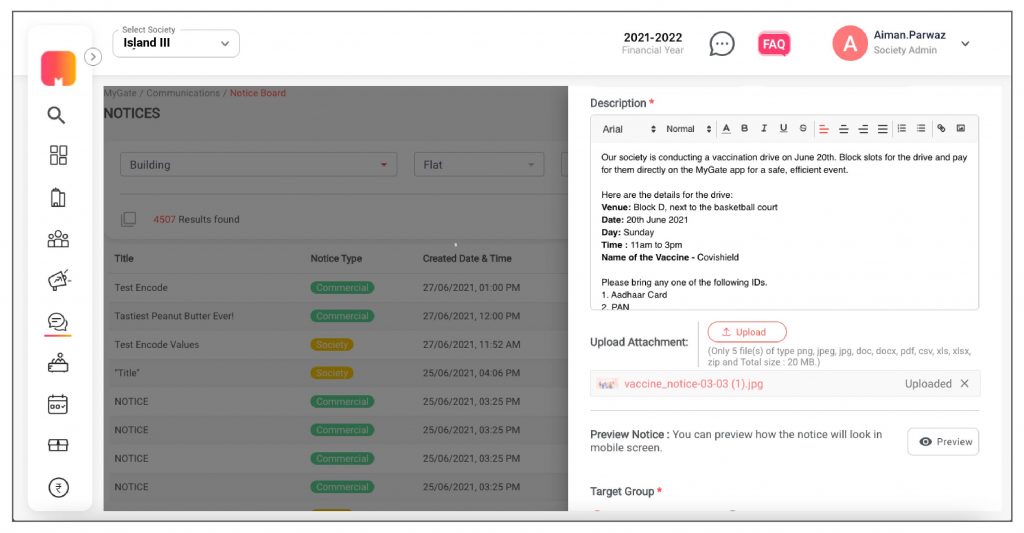
1. Go to the communication tab on the admin dashboard and click on new notice.
2. With the new enhancements, the admin can enter title (Character length 70 character), notice type, descriptions, add inline images, embed URL in notice text, set publish date and type. The admin can add attachments (jpg, jpeg, png, doc, pdf, zip, and excel) that are up to 20 MB.
3. The admin can select “Upload Thumbnail/Cover, upload a thumbnail/cover image. The thumbnail ratio has to be 1×1 and the cover image ratio should be 2×1.
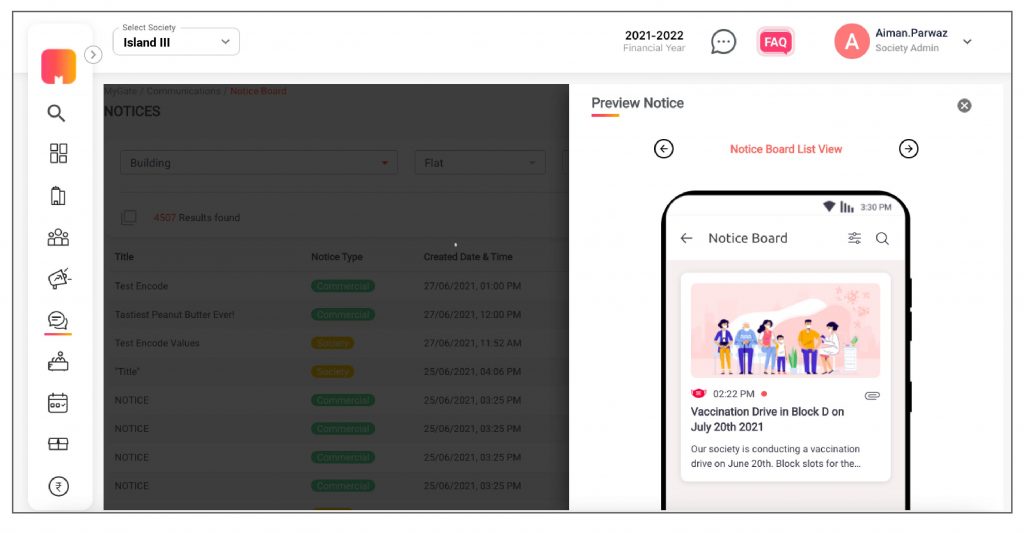
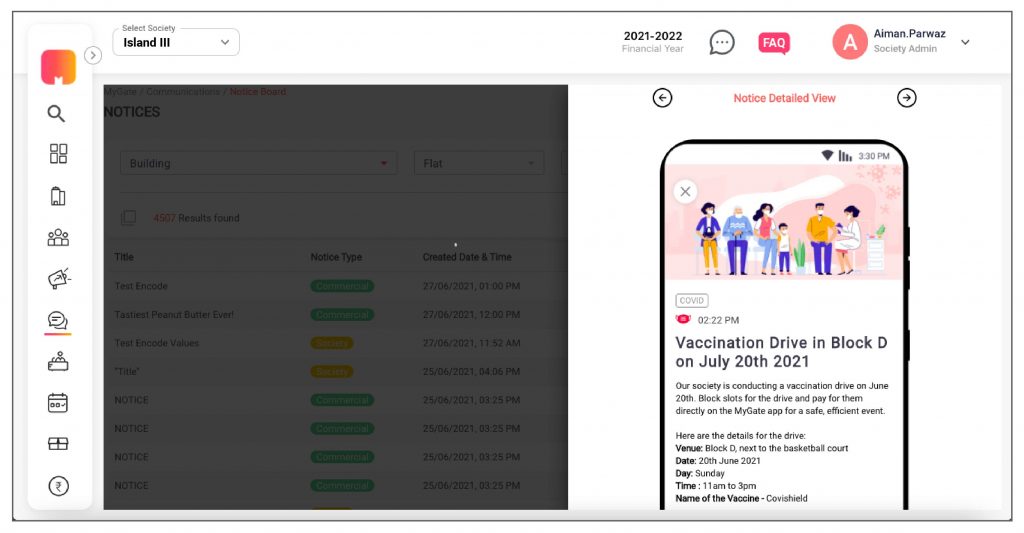
4. Before sending the notice, the admin can preview how the notice would look on the mobile phone.
5. The admin can choose to send a notice to a particular building, flat or resident type (owners or Tenants).
How it works for the residents…
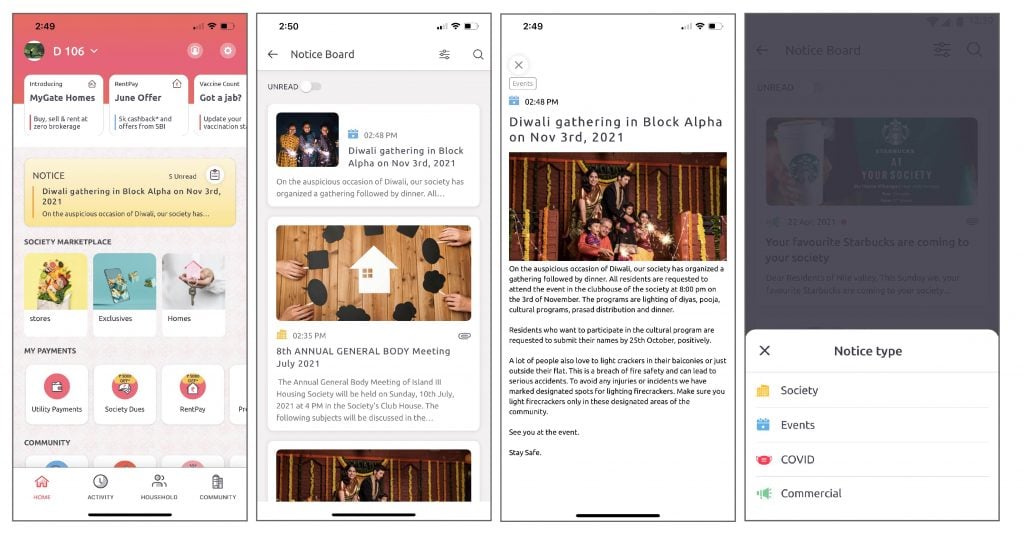
Once the feature is enabled in the society, residents can view the notices on the ‘Homescreen’.
1. Residents can click on the icon on the notice board to go to the listing page.
2. If residents click on the notice, it will directly take them to the notice detail page.
3. Residents can view attachments and files within the notice board.
4. They can also filter out the notice type they want to view.
Enable this feature for your society and get an authorized platform for community-wide broadcasting.
Contact your management committee or Mygate relationship manager to enable Notice Board for your society today!