
Written by Divyanshi Bhamri, QA Engineer at MyGate
1. Why Performance Testing?
Performance testing is mainly used to measure the speed, response time, reliability, resource usage and scalability of application under an expected workload. The primary purpose of conducting such a test is to surface performance related issues within the application. Findings from this exercise must be shared with engineers to aid in improving overall usability of application.
In this series, as part of performance testing guide we will focus on the following parameters;
- Speed: Determines whether the application responds quickly.
- Scalability: Determines maximum user load the software application can handle.
- Stability: Determines if the application is stable under varying loads.
2. Introduction to Locust
Locust is an open source performance testing tool [1] which allows you to write performance test scripts in Python. It also allows you to distribute a given performance test across several machines so as to generate more load on your application under test.
2.1 Advantages
- Simple documentation.
- Support python language.
- Locust comes with an embedded web-based user interface (in HTML and JavaScript) that displays test data in real-time.
- Distributed and scalable. Supports hundreds of thousands of users.
- Low entry barrier. It is possible to begin testing with basic programming skills.
2.2 Installing Locust
Note: Being a python application, Locust supports both 2.x and 3.x python versions. Installation is pretty straightforward Python with versions 2.7, 3.5, 3.6, 3.7, and 3.8 to choose from. Locust official recommends to work with the 3.x version [2].
Step 1: Download Python version 3.7 (https://www.python.org/downloads/windows/)Step 2: Add Python 3.7 to the path.
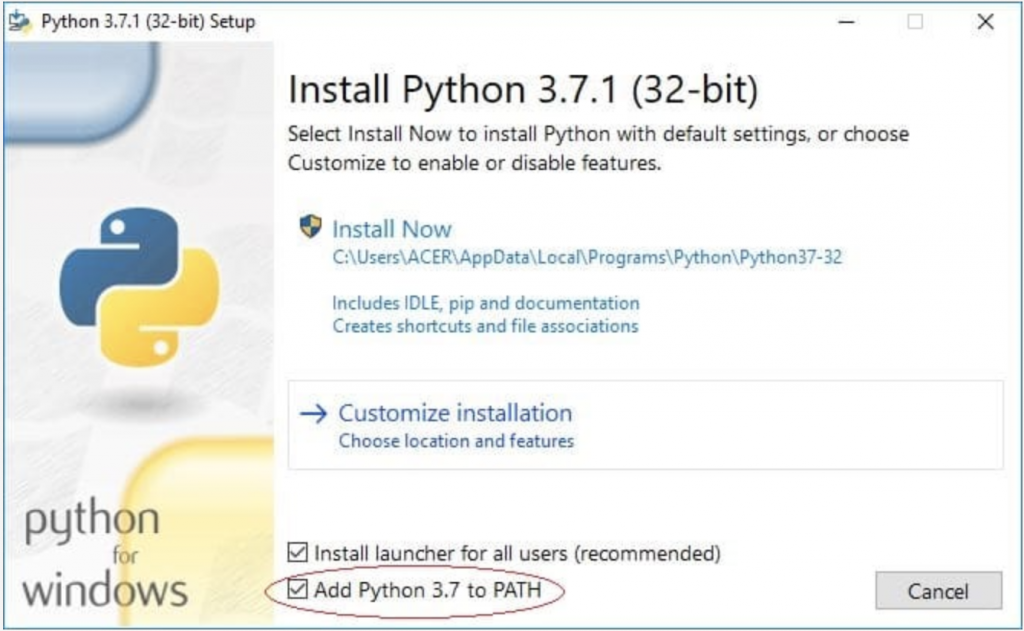
Note: By default, “Add Python to PATH” option is unchecked. Make sure it is checked and then click on Install Now. If the setup is successful, you should see a window as below.

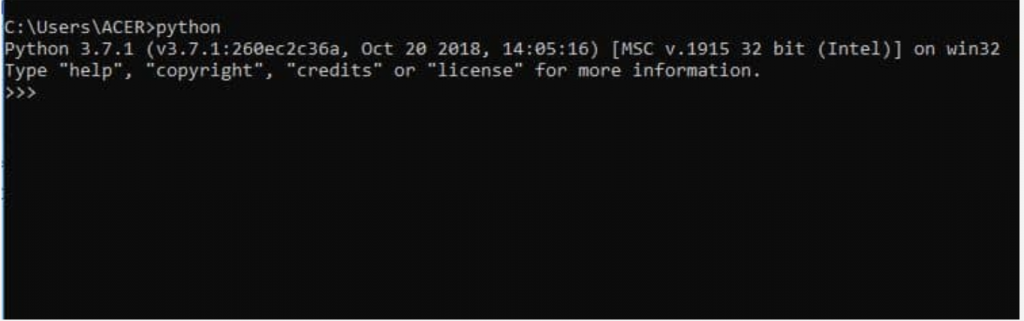
Step 3: Now let us check if Python is successfully installed. Open command prompt and type “python” on it. You should see something like this.
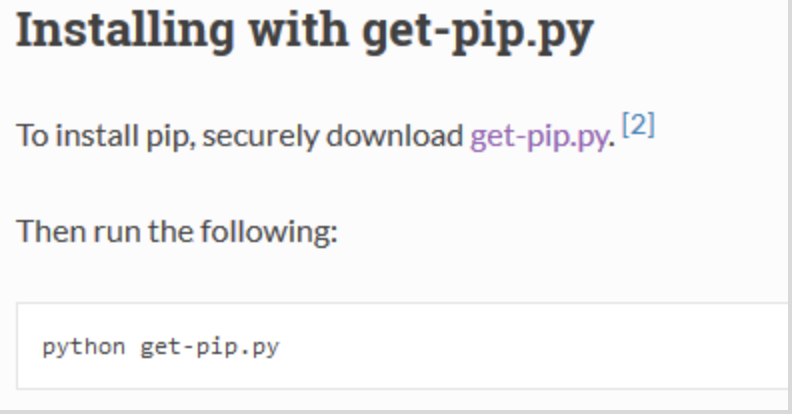
Step 4: Let us install pip. Go to the URL https://pip.pypa.io/en/stable/installing/ and save get-pip.py file. Run the following command.
python get-pip.py
Step 5: Now it is time to add pip to environment variables.
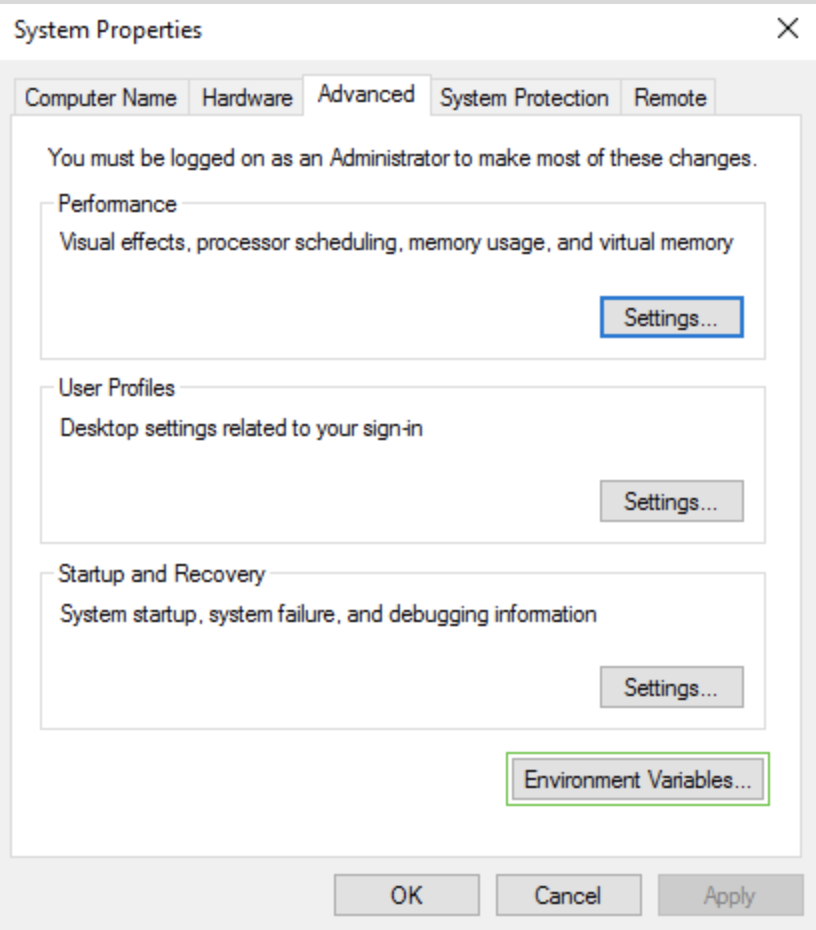
Set a path variable.

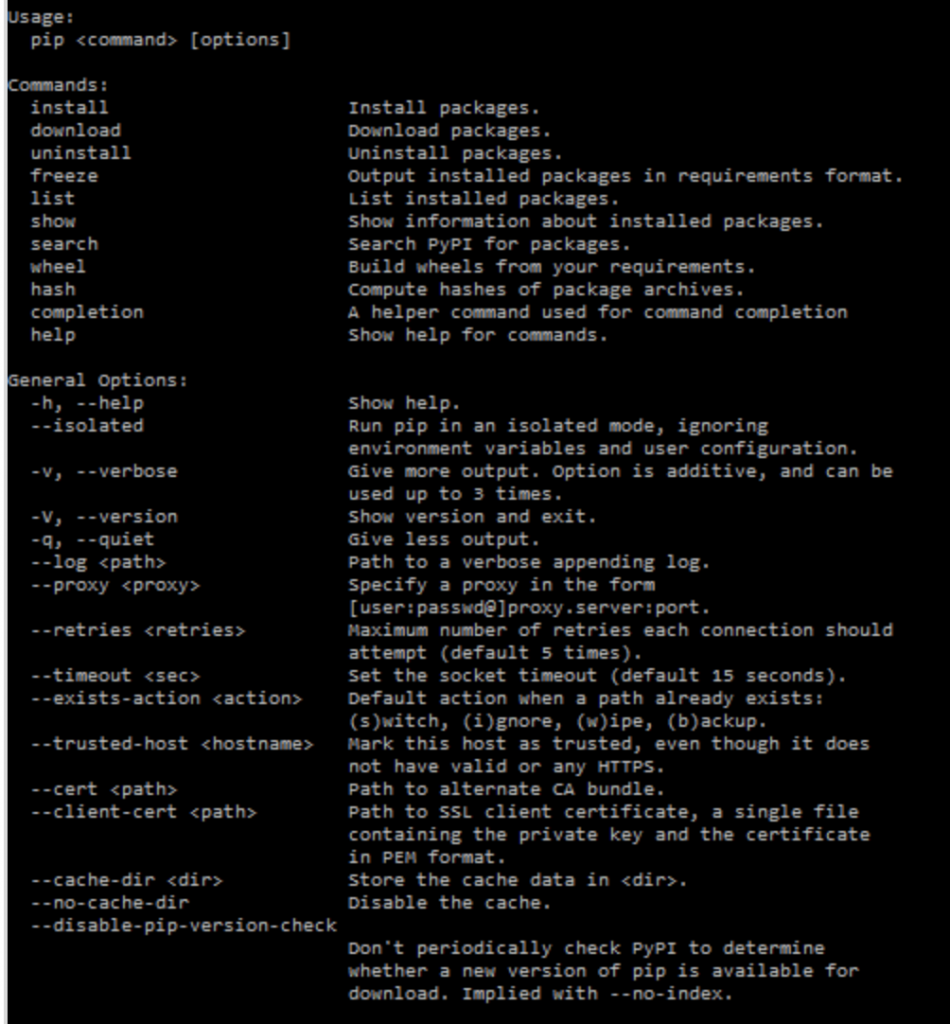
Step 6: Open command prompt and type pip. You should see the usage list which confirms that pip is successfully installed.
Step 7: Run the following command to install locust.

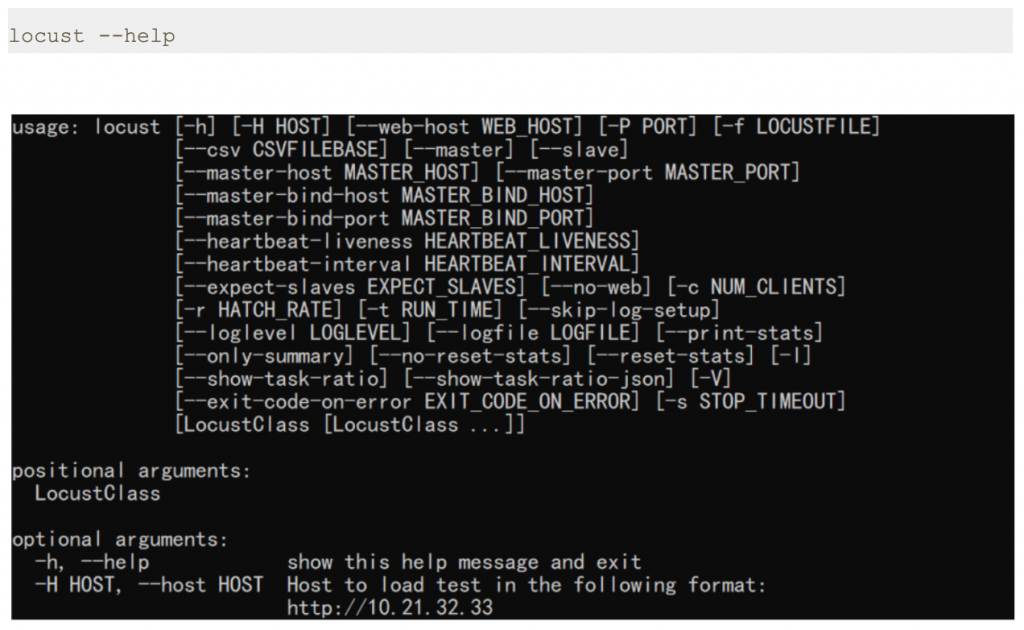
Step 8: Once you are done, you can test Locust installation by running the following command.
3. Conclusion
This is the first article of its series. In the next post we will learn more about how to use Locust and Python scripting for performance testing.
Thanks for reading. I hope this article equips you with basic knowledge of Locust installation.
References
[1] Locust – An open source load testing tool.
https://locust.io/
[2] Locust – Installation
https://docs.locust.io/en/stable/installation.html
Disclaimer
This is a curated post of an article published at Medium.