
Written by Divyanshi Bhamri, QA Engineer at MyGate
1. Introduction
Hello again. This is the second article of a series on performance testing with Locust. I strongly suggest that you take a look at part 1 of the series so that you are ready with environment setup.
Note: As a prerequisite, you need to be familiar with Python to create test scripts.
It is time to familiarise ourselves with few Locust centric attributes [1].
2. TaskSet
Class defining a set of tasks that a Locust user will execute is known as TaskSet. When a TaskSet starts running, it will pick a task from the list of activities marked with a task attribute, execute it, and call its wait_function which defines a time period to sleep. This defaults to a uniformly distributed random number between min_wait and max_wait milliseconds. It will then schedule another task for execution and repeat the process.
3. HttpLocust
For making HTTP calls, we need a class that inherits from HttpLocust. Here we can define other attributes, such as min_wait and max_wait as required.
Note: min_wait and max_wait can be defined in classes inherited either by TaskSet or HttpLocust. In our example we will be defining these attributes at class inherited by HttpLocust.
Step 1: Save this script with .py extension. I have saved this script as locusthello.py.
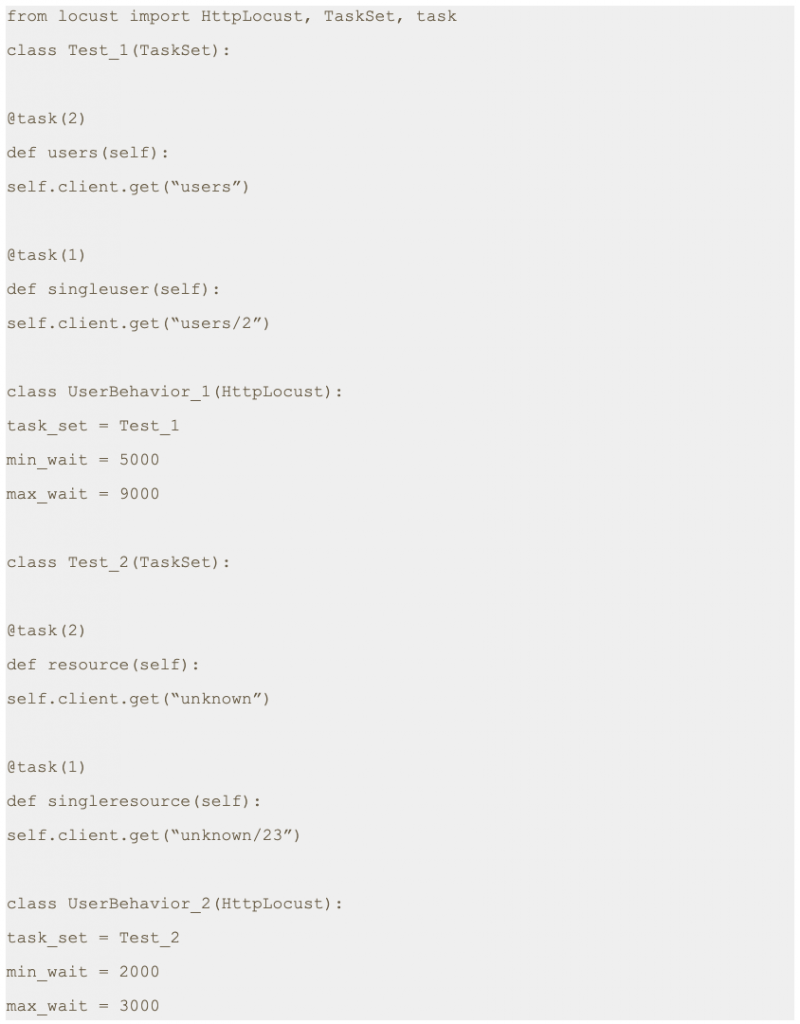
Note: In this script we are making four different GET requests to four different end points. But one of the main variables which is missing is the domain name. We will pass the domain name while running the test script from the command line with -host parameter.
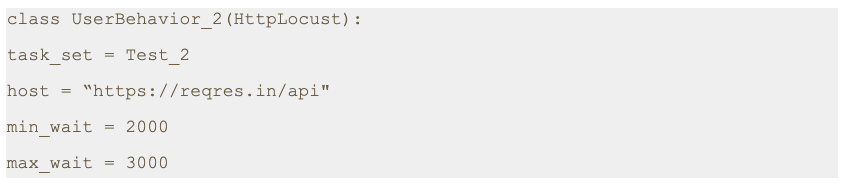
If required, we can just add a host variable within class as shown below.
4. Script execution
Step 2: Run the following command.

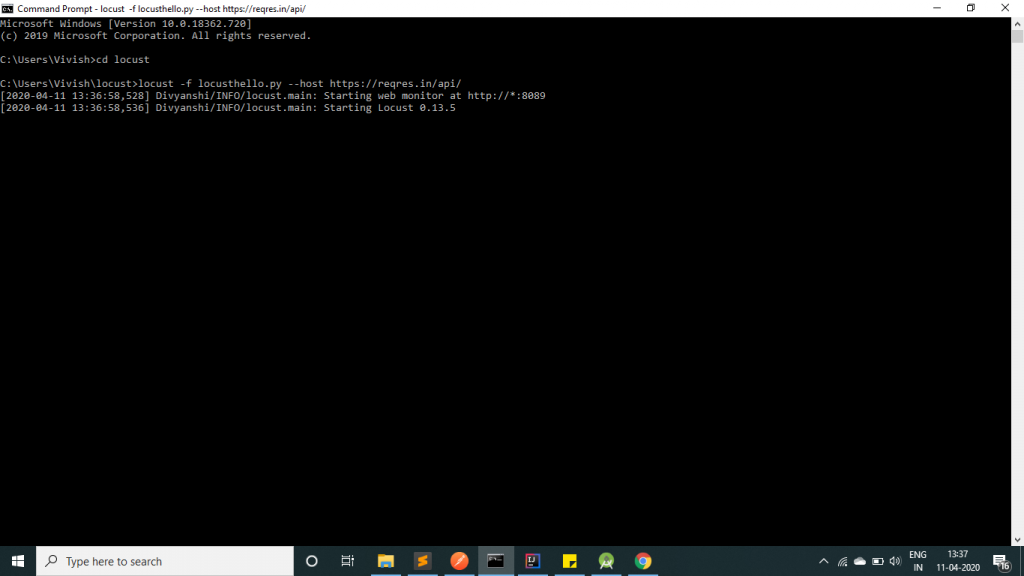
As you can see in the image, the server has been started at port 8089.Step 3: Open a browser and navigate to http://localhost:8089
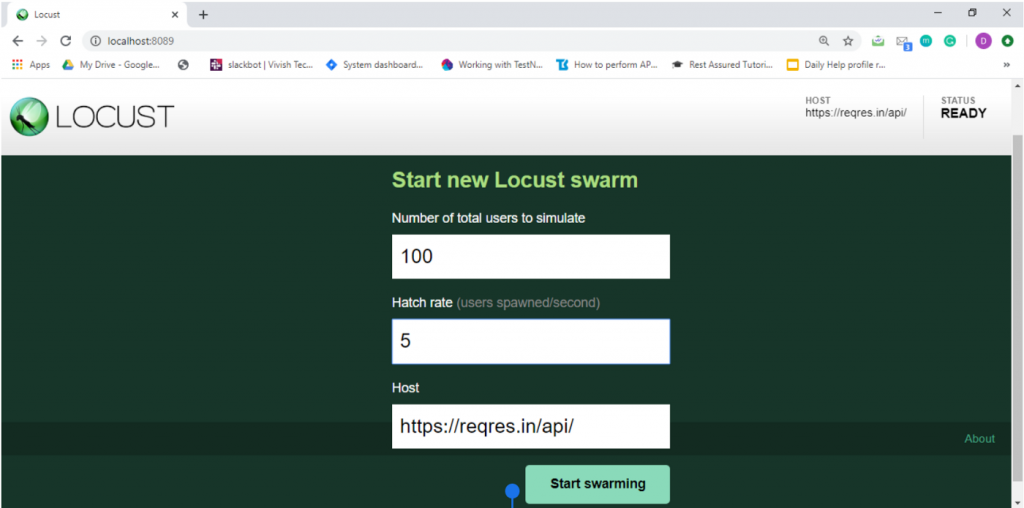
Once the page loads, you will notice two input text boxes. You need to set the maximum number of users to simulate and hatch rate which indicates ramp-up rate. I have set a configuration of 100 users with a hatch rate of 5. This translates to adding 5 users to the pool at a time until we reach 100 users. Click on submit.
Step 4: The test process starts automatically and you will see results flowing in immediately.

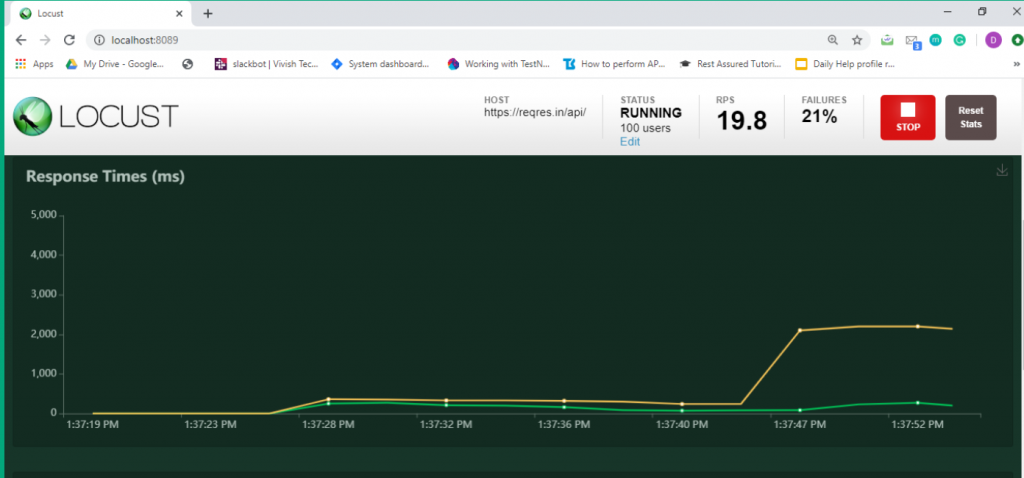
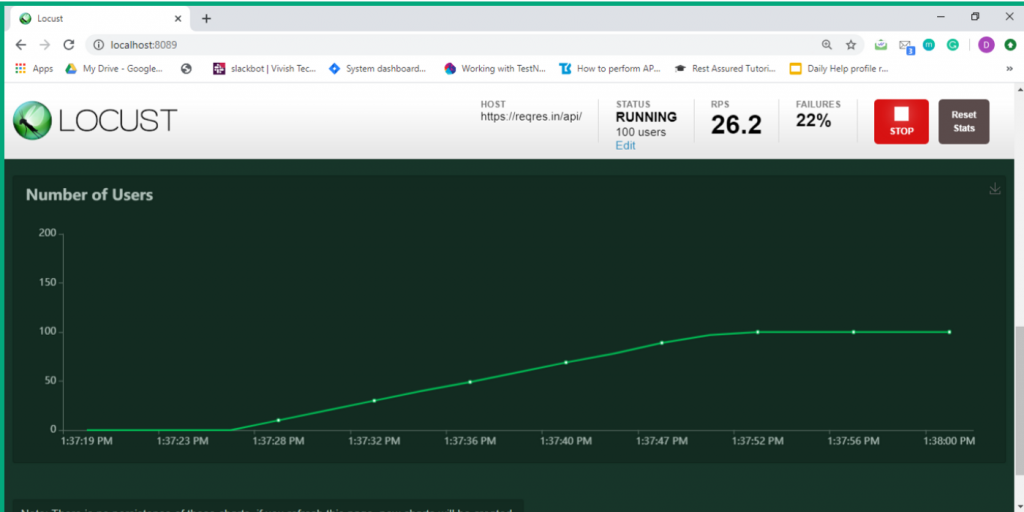
Step 5: Now click on the charts tab. You can inspect different categories of charts such as total request/ second, response time and number of users.

5. Conclusion
This is the second article of its series. In the next post we will learn about how to send POST requests.
Thanks for reading. I hope this article helps you trigger GET requests.
References
[1] Locust Documentation
https://docs.locust.io/
[2] Mock API
https://reqres.in/api
Disclaimer
This is a curated post of an article published at Medium.